[Rust] "Rust" 입문. 튜토리얼 (1) - 웹 서버 구축
Rust 언어에 익숙해지기 위해 가장 보편적 작업이 필요한 "웹 서버 구축"을 해보도록 하겠습니다. 걍 rust 에서 제공되는 library로 http listener background process 띄우기.
먼저, 새 프로젝트를 생성합니다. (https://seowoozzang.tistory.com/50 참고)
[Rust] Mac에서 "Rust" 개발 환경 구성 (2) - Hello World!
1. create new project cargo new hello-rust 2. 프로젝트 디렉토리가 생성됨 seowoochoi@Seowooui-MacBookPro test % pwd /Users/seowoochoi/work/test seowoochoi@Seowooui-MacBookPro test % cargo new hello-r..
seowoozzang.tistory.com
% cargo new testserver --bin
     Created binary (application) `testserver` package
% code -r ./testserver
우리는 바이너리 프로그램을 만들기 때문에 --bin을 입력한다. 만약 우리가 라이브러리를 만들고 있다면 --lib을 입력했을 것이다.
이제 src/main.rs 에 코드를 작성하자. 이 코드는 127.0.0.1:7878 주소로 TCP 연결 요청에 대해 수신 대기할 것이다. 만약 요청이 들어온다면, main()의 for문 내부로 들어올 것이다.
use std::io::prelude::*;
use std::net::TcpStream;
use std::net::TcpListener;

fn main() {
    let listener = TcpListener::bind("127.0.0.1:7878").unwrap();

    for stream in listener.incoming() {
        let stream = stream.unwrap();

        handle_connection(stream);
    }
}

fn handle_connection(mut stream: TcpStream) {
    let mut buffer = [0; 512];

    stream.read(&mut buffer).unwrap();

    println!("Request: {}", String::from_utf8_lossy(&buffer[..]));
}
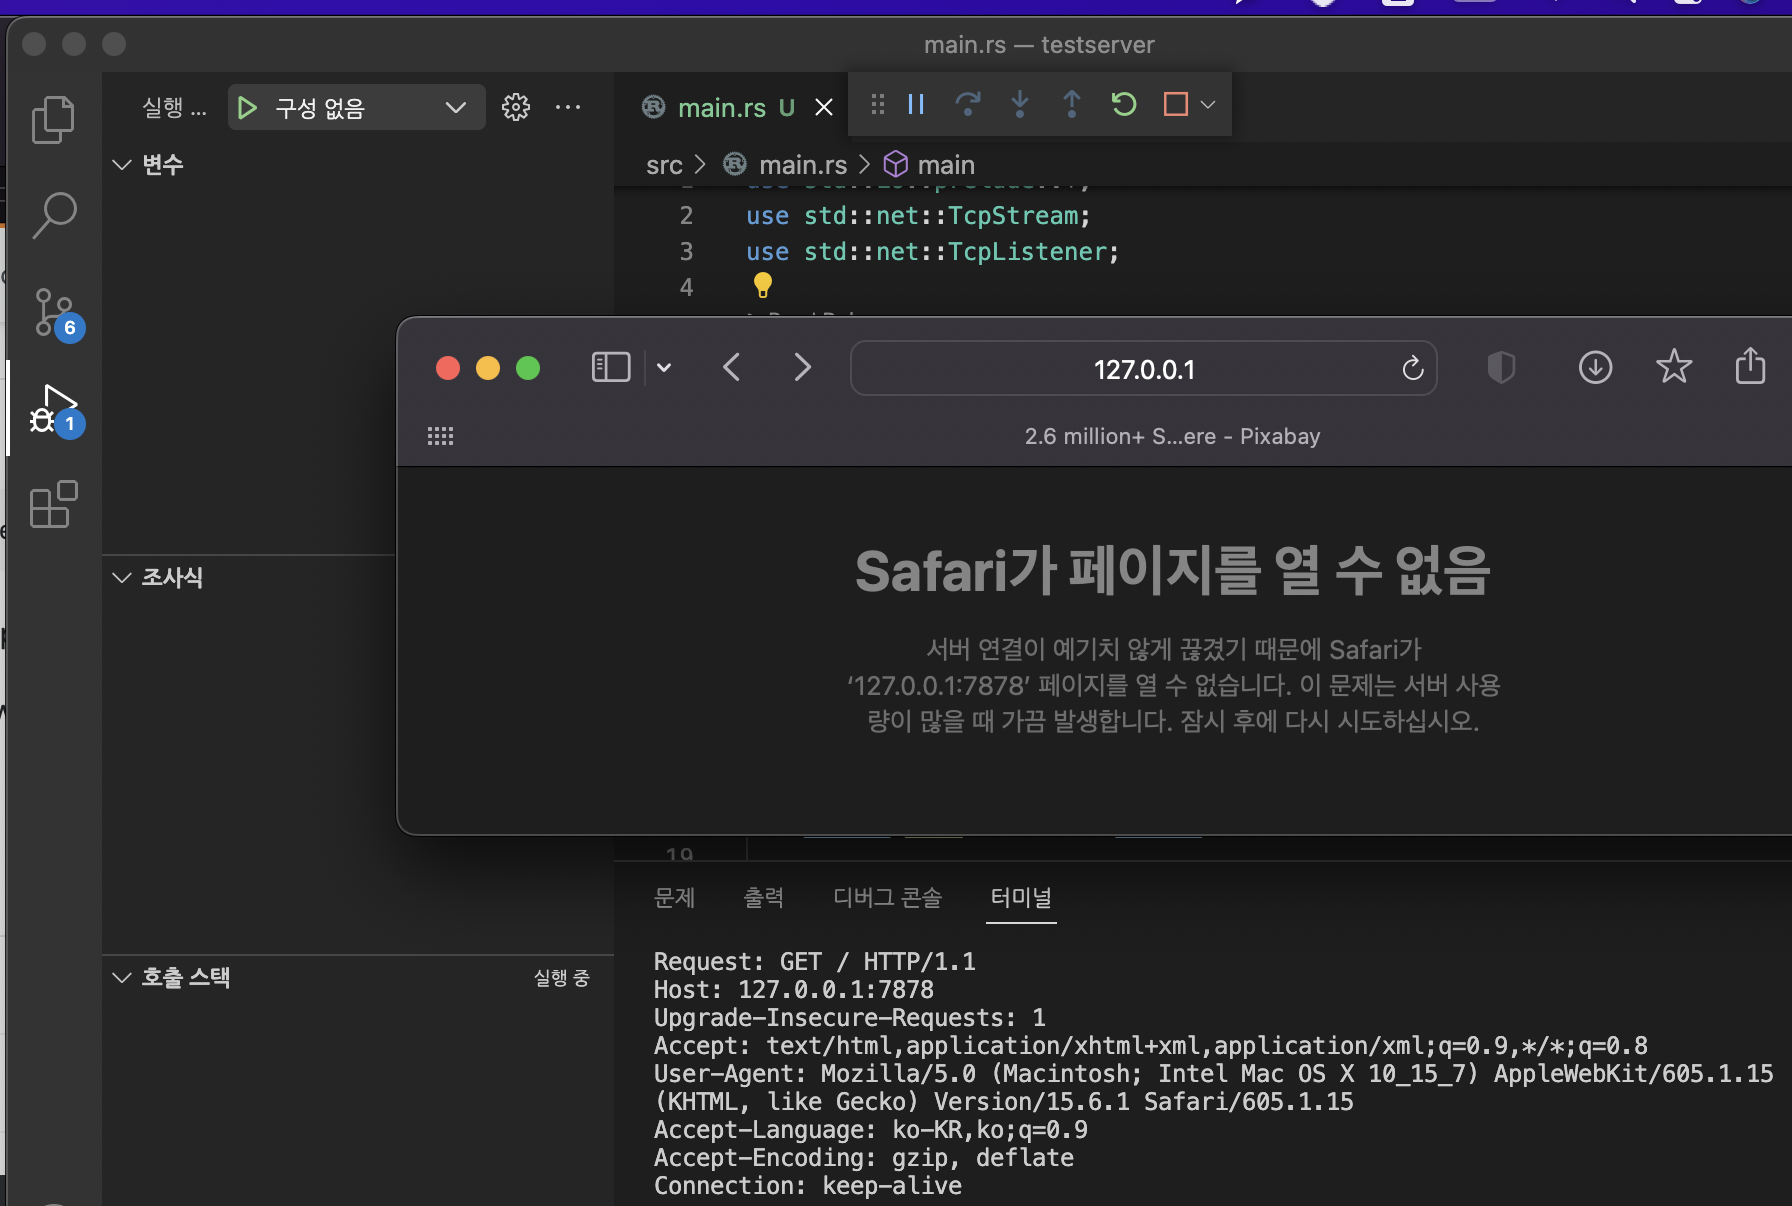
브라우저 주소창에 http://127.0.0.1:7878 입력 시 아래와 같이 페이지를 열수 없다고 나오지만 요청 내용이 터미널에 출력됨.
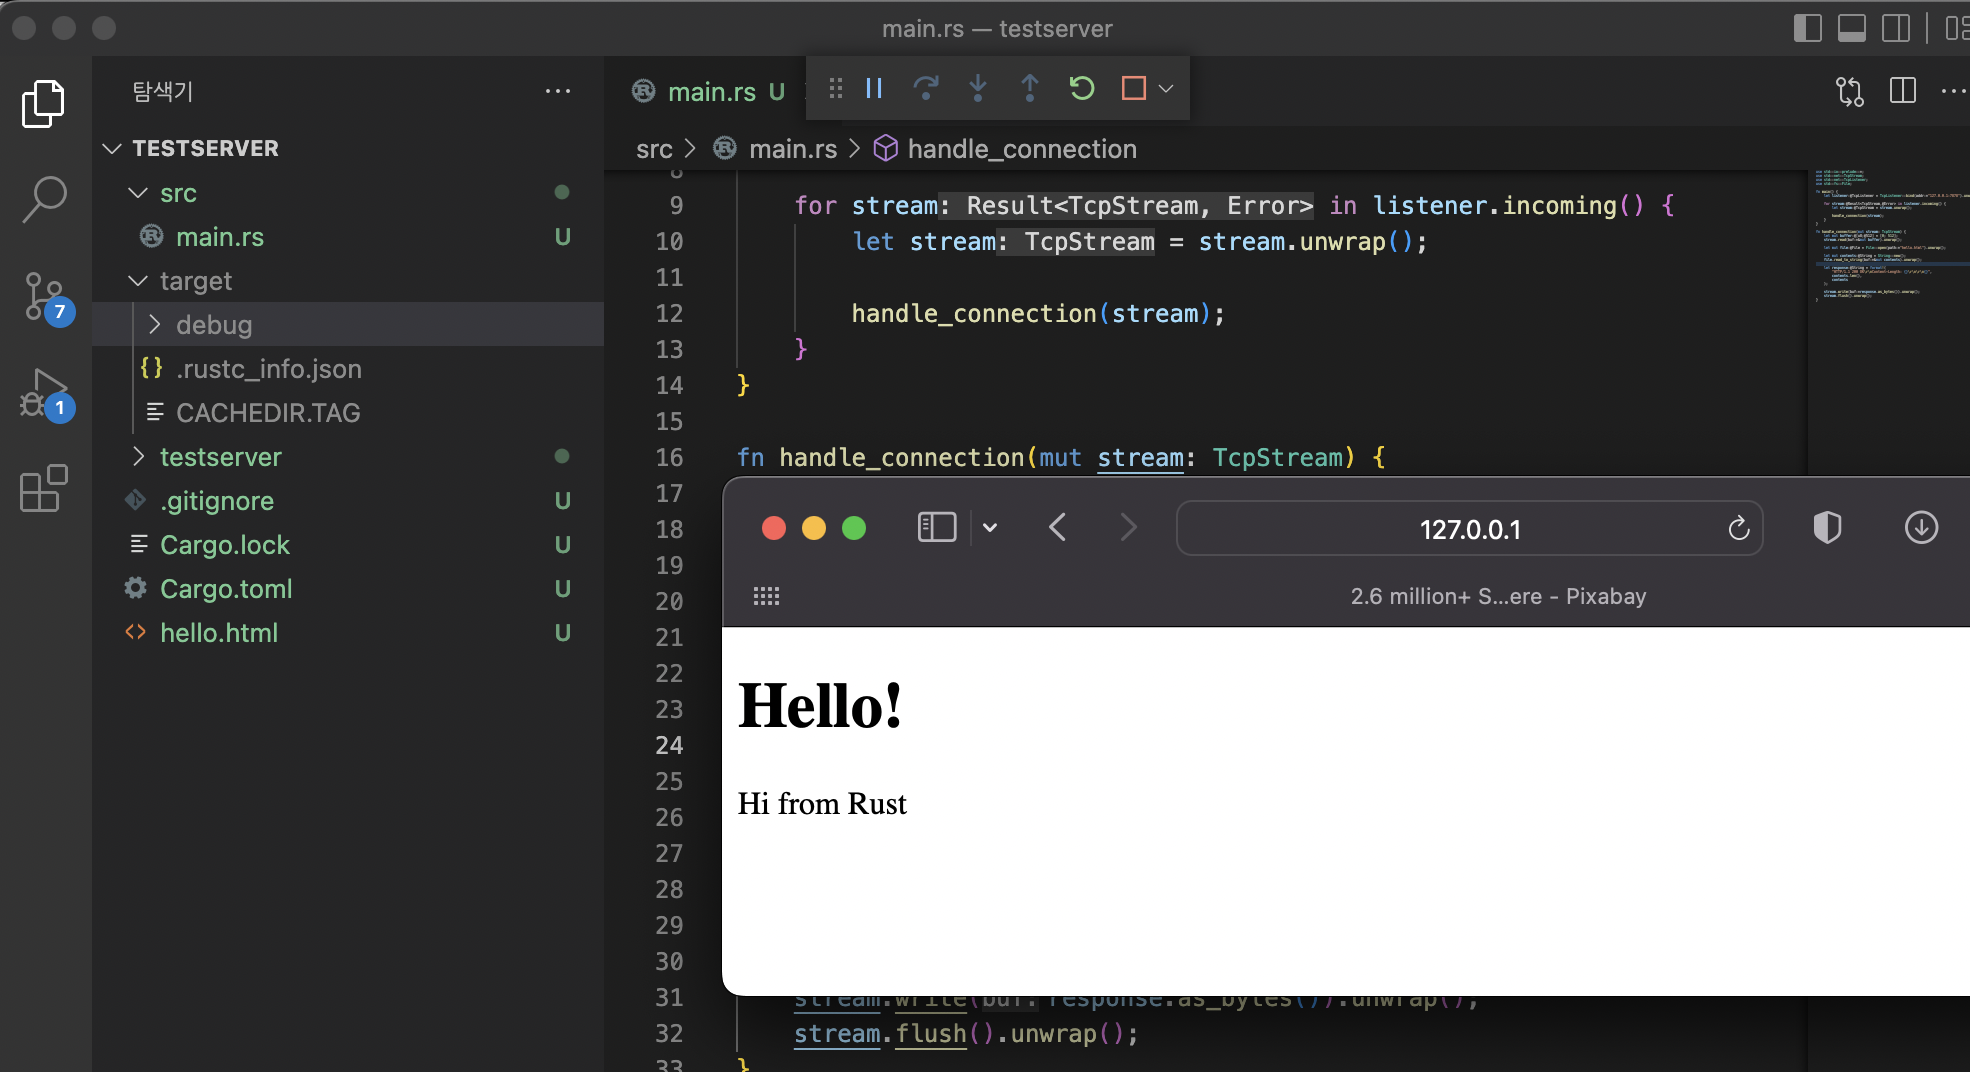
이제는 웹서비스답게 아래 내용의 파일 형태로 응답을 주어 html 페이지가 나타날 수 있게 하려 한다.
<!DOCTYPE html>
<html lang="en">
  <head>
    <meta charset="utf-8">
    <title>Hello!</title>
  </head>
  <body>
    <h1>Hello!</h1>
    <p>Hi from Rust</p>
  </body>
</html>
아래와 같이 프로젝트의 root 경로에 위 내용의 hello.html 파일을 생성한다.
이제 src/main.rs 에 코드를 작성하자.
use std::io::prelude::*;
use std::net::TcpStream;
use std::net::TcpListener;
use std::fs::File;	// 추가됨.

fn main() {
    let listener = TcpListener::bind("127.0.0.1:7878").unwrap();

    for stream in listener.incoming() {
        let stream = stream.unwrap();

        handle_connection(stream);
    }
}

// 수정됨.
fn handle_connection(mut stream: TcpStream) {
    let mut buffer = [0; 512];
    stream.read(&mut buffer).unwrap();

    let mut file = File::open("hello.html").unwrap();

    let mut contents = String::new();
    file.read_to_string(&mut contents).unwrap();

    let response = format!(
        "HTTP/1.1 200 OK\r\nContent-Length: {}\r\n\r\n{}",
        contents.len(),
        contents
    );

    stream.write(response.as_bytes()).unwrap();
    stream.flush().unwrap();
}출처: https://seowoozzang.tistory.com/52 [허무와 열정사이:티스토리]
1. create new project
cargo new hello-rust
2. 프로젝트 디렉토리가 생성됨
seowoochoi@Seowooui-MacBookPro test % pwd
/Users/seowoochoi/work/test
seowoochoi@Seowooui-MacBookPro test % cargo new hello-rust
     Created binary (application) `hello-rust` package
seowoochoi@Seowooui-MacBookPro test % find . -type f | grep -v /.git
./hello-rust/Cargo.toml
./hello-rust/src/main.rs
3. 실행
seowoochoi@Seowooui-MacBookPro test % cd hello-rust
seowoochoi@Seowooui-MacBookPro hello-rust % cargo run
   Compiling hello-rust v0.1.0 (/Users/seowoochoi/work/test/hello-rust)
    Finished dev [unoptimized + debuginfo] target(s) in 2.52s
     Running `target/debug/hello-rust`
Hello, world!
4. 수정 -> 빌드 -> 실행
seowoochoi@Seowooui-MacBookPro hello-rust % vi src/main.rs
seowoochoi@Seowooui-MacBookPro hello-rust % cat src/main.rs
fn main() {
    println!("Hello, rust!");
}
seowoochoi@Seowooui-MacBookPro hello-rust % cargo build
   Compiling hello-rust v0.1.0 (/Users/seowoochoi/work/test/hello-rust)
    Finished dev [unoptimized + debuginfo] target(s) in 0.09s
seowoochoi@Seowooui-MacBookPro hello-rust % cargo run
    Finished dev [unoptimized + debuginfo] target(s) in 0.00s
     Running `target/debug/hello-rust`
Hello, rust!
출처: https://seowoozzang.tistory.com/50?category=993988 [허무와 열정사이:티스토리]
'프로그램 개발(분석, 설계, 코딩, 배포) > 2. 개발' 카테고리의 다른 글
| Topic: Setting up C++11 SFML in Eclipse for windows Tutorial (0) | 2025.02.06 |
|---|---|
| [자료구조] 큐(Queue)의 개념과 구현(C) & 용도 (0) | 2025.02.04 |
| How to Set Up a Fullstack Rust Project with Axum, React, Vite, and Shared Types (0) | 2025.01.31 |
| c++ 웹프레임워크 dragon 설치 및 테스트 가이드 (0) | 2025.01.25 |
| web frameworks for C++ (0) | 2025.01.25 |

