출처: https://sway.tistory.com/entry/xampp-redmine
1.xamlpp 1.7.3( zip )
홈페이지 : http://www.apachefriends.org/
다운로드 : http://www.apachefriends.org/en/xampp-windows.html#641
다이렉트 : http://www.apachefriends.org/download.php?xampp-win32-1.7.3.zip


2.Ruby : 꼭 1.8.7( zip )
http://rubyforge.org/frs/?group_id=167
설명서엔 installer를 받으라 했지만(rubyinstaller-1.8.7-p302.exe)
난 ruby-1.8.7-p302-i386-mingw32.7z 를 받았다
설치가 싫어여~~

3.mongrel-service에 쓸 gem 두개
mongrel_service-0.3.4-i386-mswin32.gem
다운로드 : http://rubyforge.org/frs/?group_id=1306
win32-service-0.5.2-mswin32.gem
다운로드 : http://files.ruby.inoack.com/win32utils/


4.비로소 redmine 1.0.5 ( zip )
홈페이지 : http://www.redmine.org
다운로드 : http://rubyforge.org/frs/?group_id=1850
목록 중 redmine-1.0.5.zip

5.redmine 셋팅 중 에러 나면 libmySQL.dll
다운로드 : http://instantrails.rubyforge.org/svn/trunk/InstantRails-win/InstantRails/mysql/bin/

ruby도 압축을 풀어 적단한 곳에 놔둔다.
나같은 경우는 xampp폴더 아래 ruby에 풀었다.
2-1.윈도우 환경 변수에 ruby/bin폴더를 추가한다.
2-2. 환경변수에 ruby/bin을 등록했기 때문에 굳이 이동 안해도 되지만
편의를 위해 cmd로 ruby/bin폴더로 이동한다.
2-3.cmd 쭉 따라 쳐본다.
message : ruby 1.8.7 (2010-08-16 patchlevel 302) [i386-mingw32]
2.gem -v
message : 1.3.7
3.업데이트
gem update --system
4.rake 설치
gem install rake
5.rails 설치 꼭 2.3.5버전으루
gem install rails -v=2.3.5
6.i18n 설치
gem install -v=0.4.2 i18n
7.mongrel 설치
gem install mongrel
8.mysql driver 설치
gem install mysql
9.mongrel-service + win32-service설치
일단 gem install mongrel_service를 하면 되지만 그전에 gem 두개를 받는다.
현재 gem을 실행하는 폴더가 ruby/bin일 텐데 그 폴더에 gem 두개를 받아 놓는다.
mongrel_service-0.3.4-i386-mswin32.gem
win32-service-0.5.2-mswin32.gem
준비가 되었으면 gem install mongrel_service
설치가 끝나면 받아놓은 gem 두개를 삭제 한다.
1-1.먼저 xampp의 apache와 mysql을 올리고 http://localhost/phpmyadmin으로 들어가서
redmine에서 쓸 디비랑 db 유저를 생성한다.
create database redmine character set utf8;
create user 'redmineUser'@'localhost' identified by 'myPassword';
grant all privileges on redmine.* to 'redmineUser'@'localhost';
1-2.redmine을 적당한 폴더에 풀어 놓는다.
나같은 경우는 xampp에 project폴더 만들어서 그안에 redmine에 풀었음.
1-3.redmine\config\database.yml.example 파일을 복사하여
database.yml으로 바꾸고 파일을 열어서
production:
adapter: mysql
database: redmine
host: localhost
username: redmineUser
password: myPassword
encoding: utf8
을 추가한다.(원래는 위와 비슷한 내용이 이미 있는데 삭제하고 추가한다)
1-4.cmd에서 xampp\project\mine으로 이동 후
rake generate_session_store
rake db:migrate
순차적으로 입력한다.
이때 libmysql.dll 어쩌구 에러가 날 수 가 있는데. 첨부한 libmysql.dll을 ruby/bin에 복사하고
다시 rake db:migrate합니다.
rake redmine:load_default_data
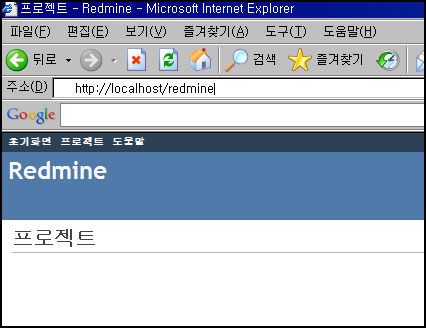
만일 홈페이지 url을 http://localhost/redmine으로 접속하고 싶으면
redmine/config/environment.rb에 젤 아랫줄에 추가한다.
Redmine::Utils::relative_url_root = "/redmine"
redmine/config/initializers/patch_for_mongrel.rb 파일을 만들어서 그 내용은
# We provide a backwards compatible wrapper around the new
# ActionController::base.relative_url_root,
# so it can still be called off of the actually non-existing
# AbstractRequest class.
module ActionController
class AbstractRequest < ActionController::Requestdef
self.relative_url_root=(path)
ActionController::Base.relative_url_root=(path)
end
def self.relative_url_root
ActionController::Base.relative_url_root
end
end
end
#
# Thanks to http://www.ruby-forum.com/topic/190287
로 입력하고 저장한다.
cmd에서 ruby script/server webrick -e production 를 실행하면 서비스가 띄워지지만.
브라우저에서 http://localhost:3000/redmine하면 css와 javascripts가 안 먹은 담백(?)한
페이지가 열린다.

서비스에 등록시킴.
mongrel_rails service::install -N mongrel_redmine_3001 -D "Mongrel serving Redmine on 3001" -p 3001 -e production -c C:\xampp\project\redmine
mongrel_rails service::install -N mongrel_redmine_3002 -D "Mongrel serving Redmine on 3002" -p 3002 -e production -c C:\xampp\project\redmine
mongrel_rails service::install -N mongrel_redmine_3003 -D "Mongrel serving Redmine on 3003" -p 3003 -e production -c C:\xampp\project\redmine
5.시작 시켜 본다 ( cmd 에서 )
net start mongrel_redmine_3001
net start mongrel_redmine_3002
net start mongrel_redmine_3003
6.services.msc /s 에서 확인해 본다.
7.자동으로 시작하게 설정( cmd에서 )
sc config mongrel_redmine_3001 start= auto
물론 5~7은 service 화면에서 바로 해도 된다.
- C:\xampp\Apache\conf\httpd.conf 하단에 아래줄 추가
Include conf/httpd-proxy-mongrel.conf
-C:\webserver\Apache\conf\httpd-proxy-mongrel.conf파일 만들고
내용은
LoadModule proxy_module modules/mod_proxy.so
</IfModule>
<IfModule !mod_proxy_http.c>
LoadModule proxy_http_module modules/mod_proxy_http.so
</IfModule>
<IfModule !mod_proxy_balancer.c>
LoadModule proxy_balancer_module modules/mod_proxy_balancer.so
</IfModule>
ProxyPass /redmine balancer://redmine_cluster
ProxyPassReverse /redmine balancer://redmine_cluster
<Proxy balancer://redmine_cluster>
BalancerMember http://127.0.0.1:3001
BalancerMember http://127.0.0.1:3002
BalancerMember http://127.0.0.1:3003
</Proxy>
- 아파치 재시작후 http://localhost/redmine하면 css도 잘 먹은 페이지 나온다.
끝
- XAMPP v3.2.1
- Ruby 2.2.4
- Redmine 3.0.4
- DevKit 4.7.2
1. XAMPP Bitnami Installation
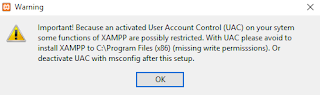
Figure 1 Bitnami Installation warning


2. Ruby on Rails Installation


Figure 13 Start Redmine Service
출처: https://nlb-creations.com/2013/06/26/installing-ruby-on-rails-and-redmine-with-xampp-on-windows-7/
Installing Ruby on Rails and Redmine with XAMPP on Windows 7
I like Xampp. It sets up a full Apache/MySQL/PHP development environment with very little hassle, which means it’s installed on just about every computer I use on a regular basis. I recently had a need to look into Ruby on Rails (specifically so that I could use the Redmine project management web app) and figured it would be easy to integrate it into my existing dev environment.
It kind of… wasn’t.
This is how I finally managed (after two days of ripping my hair out) to do it.
1) Download and install XAMPP.
2) Download RailsInstaller for Windows.
3) Install RailsInstaller to the C:\xampp\ruby\RailsInstaller directory.
– Check “Configure git and ssh when installation has completed” at the end of the install.
– Enter the requested info in the Rails Environment Configuration screen.
4) Create a new Ruby on Rails project:
a) Open a cmd window
b) Type: rails new C:/xampp/htdocs/dev-ruby/redmine/
5) Add the following to the end of the C:\xampp\config\httpd.conf file:
Listen 3000
LoadModule rewrite_module modules/mod_rewrite.so
#################################
# RUBY SETUP
#################################
<VirtualHost *:3000>
ServerName rails
DocumentRoot "c:/xampp/htdocs/dev-ruby/redmine/public/"
<Directory "c:/xampp/htdocs/dev-ruby/redmine/">
Options ExecCGI FollowSymLinks
AllowOverride all
Allow from all
Order allow,deny
AddHandler cgi-script .cgi
AddHandler fastcgi-script .fcgi
</Directory>
</VirtualHost>
#################################
# RUBY SETUP
#################################
Side Note: Make sure you try to start/restart Apache from the Xampp control panel after you save the httpd.conf file. If Apache won’t run, try removing the “Listen 3000” line.
6) Back in the cmd window, navigate to the directory of your project and start the Rails server with the following commands:
cd C:/xampp/htdocs/dev-ruby/redmine
rails server
7) In your browser, navigate to http://localhost:3000 where you should see the RoR welcome screen. Once you’ve verified RoR is working, Ctrl-C in the cmd window to shut down the server.
8) Download Redmine and extract the .zip file. Replace the files generated in C:/xampp/htdocs/dev-ruby/redmine/ with the files from the .zip file.
9) Create your Redmine database. Start Apache and MySql from the Xampp control panel, and in your browser, go to http://localhost/phpmyadmin to access the MySQL interface.
Click the SQL tab and run the following:
create database redmine character set utf8;
create user 'redmineUser'@'localhost' identified by 'myPassword';
grant all privileges on redmine.* to 'redmineUser'@'localhost';
10) Configure Redmine in the redmine/conf/database.yml file by adding your newly created database, user, and password in the appropriate locations.
11) In the cmd window, make sure you are still in your Redmine project’s directory, and run the following command:
bundle install
12) In all likelihood, it will fail epically when it gets to the rmagick gem (if not, lucky you). Go to http://rubyforge.org/projects/rmagick/ and download the file called rmagick-win32.
a) Install the Ruby Installer DevKit: https://github.com/oneclick/rubyinstaller/wiki/Development-Kit
b) Download Imagemagick (check the box to install headers in the installer) : http://www.imagemagick.org/script/binary-releases.php#windows
c) Install ImageMagick to a location that does NOT contain any spaces in the directory names (like C:/ImageMagick)
d) In the cmd window, run the following:
gem install rmagick --platform=ruby -- --with-opt-lib=c:/ImageMagick/lib --with-opt-include=c:/ImageMagick/include
e) Wait. This seems to take an ungodly amount of time, for some reason.
13) Run “bundle install” again.
14) Manually install the mysql2 gem. For some reason, bundle install doesn’t know how to do this right on Windows.
a) Download MySQL Connector from mysql.com
b) Extract the .zip file to C:/xampp/ruby/RailsInstaller/mysql
c) Run the following in the cmd window:
gem install mysql2 -- '--with-mysql-lib="C:/xampp/ruby/RailsInstaller/mysql/bin" --with-mysql-include="C:/xampp/ruby/RailsInstaller/mysql/include"'
d) Copy libmysql.dll from C:\xampp\ruby\RailsInstaller\mysql\lib to C:\xampp\ruby\RailsInstaller\Ruby1.9.3\bin
15) In the cmd window, execute the following commands:
set RAILS_ENV=production
rake generate_secret_token
rake db:migrate
rake redmine:load_default_data
* That last line is optional.
16) Start the rails server. In the cmd window, navigate to C:/xampp/htdocs/dev-ruby/redmine and execute the following:
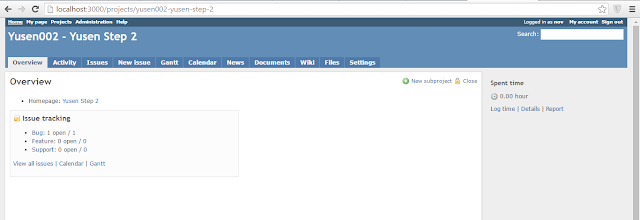
rails server
17) In your browser, navigate to http://localhost:3000 where you should now see the Redmine homepage.
18) If you’re still sane, enjoy your new Redmine install.
** It’s also worth noting that Redmine won’t actually be RUNNING on XAMPP’s Apache server. It will be running on the Rails server. This just makes it play nice with a new or existing XAMPP install.
출처: https://blog.naver.com/sdrock/220000490710
* window7 환경에서 설정방법임
1. Mysql 설치
설치파일 다운로드 : http://dev.mysql.com/downloads/mysql/
2. Mysql adapter (connecter) 설치
2-1. 설치파일 다운로드 : http://dev.mysql.com/downloads/connector/c/
2-2. 설치된 경로에서 libmysql.dll 파일을 복사해서
(Connector/C (libmysql) is a client library for C development.)
Ruby1.9.3\bin\ 폴더에 Copy 한다
3. config/database.yml 파일 수정
development:
adapter: mysql2
database: world
nsername: root
password: a1234
host: localhost
* password를 숫자로 시작하면 오류가 발생
4. vendor/Gemfile 수정
#gem 'sqlite3' (#은 주석처리)
gem 'mysql2'
5. gem install mysql2
gem install mysql2
6. gem install activerecord-mysql2-adapter
gem install activerecord-mysql2-adapter
7. bundle install
bundle install
8. rake db:migrate
rake db:migrate
해서 오류가 없으면 성공
[출처] Ruby on Rails Mysql 연결2.|작성자 루트
'프로그램 개발(분석, 설계, 코딩, 배포) > 100. 기타' 카테고리의 다른 글
| sparc m12-2s zfs MEMORY 320GB KERNEL PARAMETER (0) | 2025.02.24 |
|---|---|
| mysql-connector with mariaDB 버전 호환성 이슈 (0) | 2025.02.21 |
| 위험관리계획서 작성 예시 (0) | 2025.02.20 |
| vscode에서 rust 사용하기 (Windows) (0) | 2025.02.19 |
| vi 특수문자 입력 방법 (0) | 2025.02.19 |


