ㅁ cockpit: 네트워크를 통해 인프라 원격 관리
ㅁ 설치 방법
출처: https://computingforgeeks.com/manage-rocky-linux-using-cockpit-web-console/
Step 1. Installing Cockpit Web Console on Rocky Linux 8
By default, Cockpit is not installed on your Rocky Linux 8 system. So we need to get it installed on Rocky Linux 8 using the command:
sudo yum install cockpitDependency Tree:
Dependencies resolved.
================================================================================
 Package                     Arch     Version                 Repository   Size
================================================================================
Installing:
 cockpit                     x86_64   238.2-1.el8             baseos       75 k
Installing dependencies:
 PackageKit                  x86_64   1.1.12-6.el8            appstream   598 k
 PackageKit-glib             x86_64   1.1.12-6.el8            appstream   139 k
 bzip2                       x86_64   1.0.6-26.el8            baseos       59 k
 cockpit-bridge              x86_64   238.2-1.el8             baseos      534 k
 cockpit-system              noarch   238.2-1.el8             baseos      3.4 M
 cockpit-ws                  x86_64   238.2-1.el8             baseos      1.3 M
 dejavu-fonts-common         noarch   2.35-7.el8              baseos       73 k
 fontpackages-filesystem     noarch   1.44-22.el8             baseos       15 k
 gdk-pixbuf2                 x86_64   2.36.12-5.el8           baseos      465 k
 glib-networking             x86_64   2.56.1-1.1.el8          baseos      153 k
 gsettings-desktop-schemas   x86_64   3.32.0-5.el8            baseos      632 k
 json-glib                   x86_64   1.4.4-1.el8             baseos      143 k
 libappstream-glib           x86_64   0.7.14-3.el8            baseos      336 k
 libmodman                   x86_64   2.0.1-17.el8            baseos       35 k
 libproxy                    x86_64   0.4.15-5.2.el8          baseos       73 k
 libsoup                     x86_64   2.62.3-2.el8            baseos      423 k
 libstemmer                  x86_64   0-10.585svn.el8         baseos       72 k
 libxslt                     x86_64   1.1.32-6.el8            baseos      249 k
 python3-lxml                x86_64   4.2.3-2.el8             appstream   1.5 M
 python3-psutil              x86_64   5.4.3-10.el8            appstream   372 k
 python3-ptyprocess          noarch   0.5.2-4.el8             appstream    30 k
 python3-setuptools          noarch   39.2.0-6.el8            baseos      162 k
 python3-webencodings        noarch   0.5.1-6.el8             appstream    26 k
 sos                         noarch   4.0-11.el8              baseos      687 k
 tracer-common               noarch   0.7.5-2.el8             appstream    33 k
Installing weak dependencies:
 abattis-cantarell-fonts     noarch   0.0.25-6.el8            appstream   154 k
 cockpit-packagekit          noarch   238.2-1.el8             appstream   648 k
 dejavu-sans-mono-fonts      noarch   2.35-7.el8              baseos      446 k
 python3-html5lib            noarch   1:0.999999999-6.el8     appstream   213 k
 python3-pexpect             noarch   4.3.1-3.el8             appstream   137 k
 python3-tracer              noarch   0.7.5-2.el8             appstream   121 k
 rocky-logos                 x86_64   84.5-8.el8              baseos      328 k
 sscg                        x86_64   2.3.3-14.el8            appstream    48 k

Transaction Summary
================================================================================
Install  34 Packages

Total download size: 14 M
Installed size: 35 M
Is this ok [y/N]: y
With Cockpit installed, we need to start and enable the cockpit.socket service to connect the system through the web console.
sudo systemctl start cockpit.socket
sudo systemctl enable --now cockpit.socket
Check the status of the service:
$ systemctl status cockpit.socket
● cockpit.socket - Cockpit Web Service Socket
   Loaded: loaded (/usr/lib/systemd/system/cockpit.socket; enabled; vendor preset: disabled)
   Active: active (listening) since Sat 2021-09-04 10:00:58 EDT; 21s ago
     Docs: man:cockpit-ws(8)
   Listen: [::]:9090 (Stream)
    Tasks: 0 (limit: 9688)
   Memory: 1.0M
   CGroup: /system.slice/cockpit.socket

Sep 04 10:00:58 rockylinux8.linuxvmimages.local systemd[1]: Starting Cockpit Web Service Socket.
Sep 04 10:00:58 rockylinux8.linuxvmimages.local systemd[1]: Listening on Cockpit Web Service Socket.
Check the port on which the service is running
$ sudo ps auxf|grep cockpit
rockyli+    8166  0.0  0.0  12112  1100 pts/0    S+   10:01   0:00              \_ grep --color=auto cockpit
From the output, the service is running on port 9090. So we need to allow this port through the firewall.
sudo firewall-cmd --add-service=cockpit --permanent
sudo firewall-cmd --reload
Step 2: Logging in to the Cockpit Web Console on Rocky Linux 8
First, log in to the cockpit web console using the system user account credentials. This is necessary because Cockpit uses the PAM stack authentication method found in /etc/pam.d/cockpit. This enables you to log in with the username and password of any local account on the system.
Please use one of the following browsers to open the web console.
- Google Chrome 57 and later
- Microsoft Edge 16 and later
- Mozilla Firefox 52 and later
User the URL https://IP_Address:9090 or https://HOSTNAME:9090 to access the web console. In case you are using a self-signed certificate, you will get a warning on the browser. You need to verify it and proceed. Although this security warning can be avoided by installing a certificate signed by a Certificate Authority (CA).

Now you should see the below page:

If you sign in with an account with sudo privileges, you will be able to perform administrative tasks such as installing software, configuring your system e.t.c
 Root login is now by default disabled by /etc/cockpit/disallowed-users, so if you want to allow root login you will need to remove the root entry from that file. /etc/cockpit/disallowed-users 에서 root 주석 처리함  |
On successful login, you will see this Cockpit web console

Step 3: Manage Rocky Linux 8 Server using Cockpit Web Console
Now we are set to manage Rocky Linux 8 server using the Cockpit web console. There are many tasks you can perform with Cockpit as illustrated below.
Restarting Rocky Linux 8 using Cockpit
To restart your Rocky Linux 8 system, navigate to Overview and click on the restart button on your far right as shown.

You can delay or restart immediately using the Delay drop-down as shown.

With the desired option selected, click restart.
Shutting down Rocky Linux 8 using Cockpit
Similarly, to shut down your system, navigate to the Overview tab, and in the restart drop-down list select shutdown as shown.

Here you can also select an optional delay as we did while restarting.

Configuring time settings on Rocky Linux 8 using Cockpit.
You can use a Network Time Protocol (NTP) server to set a time zone and synchronize the system by navigating to the Overview tab and click on the system time as shown

In the Change System Time window, change the time zone. Set the time in the drop-down menu and select one of the following options: Manually, Automatically using NTP server and Automatically using specific NTP servers.

Once selected, click Change to apply the settings.
Manage VMs on Rocky Linux 8 using Cockpit.
This is done by locating the Virtual Machines option in the left panel.

On this page, you can create a VM by clicking on Create new VM.

Fill in the required details you need to have the ISO file to mount it in the Installation Source segment.

Finish VM creation by clicking on Create. Once done, your VM will be created and listed.
View System logs on Rocky Linux 8 using Cockpit
This is done by clicking on logs in the left panel.

Configure Network and Firewall on Rocky Linux 8 using Cockpit.
In the left panel, select network as shown.

While on this page, there is a variety of actions you can perform such as editing firewall rules, add networks(bridge, bond, VLAN,team).
Manage system services on Rocky Linux 8 using Cockpit.
Click on services on the left panel as shown.

On this page, you can view the status of services on your system and manage them appropriately.
Configure SELinux on Rocky Linux 8 using Cockpit.
SELinux can be accessed and configured using Cockpit by clicking on it in the left panel as shown.

While on this page, you can see the mode of SELinux. For me, it is in the Enforcing mode. You can activate and deactivate it accordingly. You can also see allowed applications.
Access the Terminal on Rocky Linux 8 using Cockpit.
Cockpit also allows you to access the terminal and issue commands to your system. To access it, launch the terminal using the panel on your left as shown.

That is it! We have come to the end of this guide on how to manage Rocky Linux 8 Server using Cockpit Web Console. This helps system admins to perform their operations easily because Cockpit has a simple and user-friendly web UI that can be accessed on laptops, mobile phones, and tablets. I hope this guide was of importance to you.
See more:
- Install Ajenti Control Panel on CentOS 8 | RHEL 8 | Rocky Linux 8
- Install CloudPanel Control Panel on Ubuntu
- How To Install Ajenti Control Panel on Ubuntu
- Best Commercial Cpanel Alternatives
Setup KVM Virtualization Host on Rocky Linux 9
CentLinux: Virtualization | CentOS/Rocky Linux Server Configurations
© 2023 CentLinux. All Rights Reserved.
www.centlinux.com
출처: Setup KVM Virtualization Host on Rocky Linux 9 | CentLinux
In this tutorial, you will learn how to setup KVM virtualization host on Rocky Linux 9 or other RPM based Linux distros.
Table of Contents:
- What is KVM?
- Environment Specification
- Check CPU Virtualization Support
- Configure Hostname and Name Resolution
- Updating your Linux Operating System
- Install KVM on Rocky Linux 9
- Create your First KVM Virtual Machine
- Install Cockpit Web UI on Rocky Linux 9
- Conclusion
What is KVM? :
Kernel-based Virtual Machine (KVM) is an open source virtualization technology built into Linux®. Specifically, KVM lets you turn Linux into a hypervisor that allows a host machine to run multiple, isolated virtual environments called guests or virtual machines (VMs).
KVM is part of Linux. If you’ve got Linux 2.6.20 or newer, you’ve got Linux hypervisor. KVM was first announced in 2006 and merged into the mainline Linux kernel version a year later. Because KVM is part of existing Linux code, it immediately benefits from every new Linux feature, fix, and advancement without additional engineering.
KVM converts Linux into a type-1 (bare-metal) hypervisor. All hypervisors need some operating system-level components—such as a memory manager, process scheduler, input/output (I/O) stack, device drivers, security manager, a network stack, and more—to run VMs. KVM has all these components because it’s part of the Linux kernel. Every VM is implemented as a regular Linux process, scheduled by the standard Linux scheduler, with dedicated virtual hardware like a network card, graphics adapter, CPU(s), memory, and disks.
Recommended Online Training: Linux KVM for System Engineers

Recommeded Book: Mastering KVM Virtualization by Vedran Dakic, Humble Devassy Chirammal & 2 more
Environment Specification:
We are using a Rocky Linux 9 minimal installed virtual machine with following specifications.
- CPU - 3.4 Ghz (2 cores)
- Memory - 2 GB
- Storage - 20 GB
- Operating System - Rocky Linux release 9.0 (Blue Onyx)
- Hostname - kvm-01.centlinux.com
- IP Address - 192.168.116.131 /24
Check CPU Virtualization Support:
Connect with kvm-01.centlinux.com as root user by using a ssh client.
By executing lscpu command, you can easily verify that, Is your CPU is supporting virtualization or not?
# lscpu | grep Virtualization
Virtualization:                  VT-x
Virtualization type:             full
If you get the above output, then it means that your CPU supports virtualization and you can setup a KVM virtualization host thereon.
However, if the above command returns no result on your server then:
- In case of bare-metal machine, you have to enable the VT support from system BIOS.
- In case of virtual machine, you have to enable the VT support from VM's CPU Settings.
Configure Hostname and Name Resolution:
By using hostnamectl command, set the hostname of your Linux KVM host.
# hostnamectl set-hostname kvm-01.centlinux.comExecute following command to enable Name resolution of your Local Linux server.
# echo "192.168.116.131 kvm-01 kvm-01.centlinux.com" >> /etc/hosts
Updating your Linux Operating System:
Refresh cache of your enabled yum repositories with the help of dnf command.
# dnf makecache
Rocky Linux 9 - BaseOS                          1.2 kB/s | 3.6 kB     00:03
Rocky Linux 9 - AppStream                       1.9 kB/s | 3.6 kB     00:01
Rocky Linux 9 - Extras                          1.3 kB/s | 3.4 kB     00:02
Metadata cache created.
Now, execute following command to update your Linux operating system.
# dnf update -yIf the above command updates your Linux Kernel, then you should reboot your operating system with the new Linux Kernel.
# rebootCheck the versions of your Linux operating system and Kernel as follows.
# cat /etc/rocky-release
Rocky Linux release 9.0 (Blue Onyx)

# uname -r
5.14.0-70.17.1.el9_0.x86_64
Install KVM on Rocky Linux 9:
Execute following dnf command to install KVM software packages on your Rocky Linux server.
# dnf install -y qemu-kvm qemu-img libvirt virt-installTo enable IOMMU (input-output memory management unit) support, you are required to edit GRUB configurations.
Edit grub configuration file by using vim text editor.
# vi /etc/default/grubEdit GRUB_CMDLINE_LINUX directive and add "intel_iommu=on iommu=pt" at the end of the line.
GRUB_CMDLINE_LINUX="crashkernel=1G-4G:192M,4G-64G:256M,64G-:512M resume=/dev/mapper/rl-swap rd.lvm.lv=rl/root rd.lvm.lv=rl/swap intel_iommu=on iommu=pt"You need to regenerate your grub.cfg file by executing grub2-mkconfig command.
# grub2-mkconfig -o /boot/grub2/grub.cfg
Generating grub configuration file ...
Adding boot menu entry for UEFI Firmware Settings ...
done
Reboot your system with the modified directives.
# rebootExecute the following command to check your platform support as required by KVM virtualization host.
# virt-host-validate
  QEMU: Checking for hardware virtualization                                 : PASS
  QEMU: Checking if device /dev/kvm exists                                   : PASS
  QEMU: Checking if device /dev/kvm is accessible                            : PASS
  QEMU: Checking if device /dev/vhost-net exists                             : PASS
  QEMU: Checking if device /dev/net/tun exists                               : PASS
  QEMU: Checking for cgroup 'cpu' controller support                         : PASS
  QEMU: Checking for cgroup 'cpuacct' controller support                     : PASS
  QEMU: Checking for cgroup 'cpuset' controller support                      : PASS
  QEMU: Checking for cgroup 'memory' controller support                      : PASS
  QEMU: Checking for cgroup 'devices' controller support                     : PASS
  QEMU: Checking for cgroup 'blkio' controller support                       : PASS
  QEMU: Checking for device assignment IOMMU support                         : PASS
  QEMU: Checking if IOMMU is enabled by kernel                               : PASS
  QEMU: Checking for secure guest support                                    : WARN (Unknown if this platform has Secure Guest support)
Secure Guest Support warning can be ignored since that check is not for Intel CPUs and we are using an Intel Microprocessor.
KVM and QEMU hypervisors has been installed on your Rocky Linux 9 server.
Read Also:
Setup KVM Virtualization Host on CentOS 8
Create your First KVM Virtual Machine:
Your Linux virtualization platform has been configured successfully. Now, it is time to create your first KVM virtual machine.
Here, we are showing you the process of creating virtual machine from Linux Commandline. However, it is not the only way to do the job. You can also use GUI based virt-manager tool for this purpose.
But, we usually do not has GUI enabled on Linux servers, so we prefer to used the Linux CLI for Server management tasks.
Execute virt-install command to create your first KVM virtual machine. The command is self explanatory and requires only a few parameters such as machine name, memory, number of CPUs, Disk Size, etc.
# virt-install --name kvm-guest-01 \
> --memory 512 \
> --vcpus 1 \
> --disk size=20 \
> --os-variant rhel9.0 \
> --location /var/lib/libvirt/iso/Rocky-9.0-x86_64-minimal.iso \
> --graphics none \
> --extra-args='console=ttyS0'

Starting installer, one moment...
anaconda 34.25.0.29-1.el9_0.rocky.0.3 for Rocky Linux 9.0 started.
 * installation log files are stored in /tmp during the installation
 * shell is available on TTY2
 * if the graphical installation interface fails to start, try again with the
   inst.text bootoption to start text installation
 * when reporting a bug add logs from /tmp as separate text/plain attachments
================================================================================
================================================================================
Text mode provides a limited set of installation options. It does not offer
custom partitioning for full control over the disk layout. Would you like to use
VNC mode instead?

1) Start VNC
2) Use text mode

Please make a selection from the above ['c' to continue, 'q' to quit, 'r' to
refresh]: 2
Enter '2' and press <ENTER>.
================================================================================
Installation

1) [x] Language settings                 2) [x] Time settings
       (English (United States))                (America/New_York timezone)
3) [!] Installation source               4) [!] Software selection
       (Processing...)                          (Processing...)
5) [!] Installation Destination          6) [x] Kdump
       (Processing...)                          (Kdump is enabled)
7) [x] Network configuration             8) [!] Root password
       (Wired (enp1s0) connected)               (Root account is disabled)
9) [!] User creation
       (No user will be created)

Please make a selection from the above ['b' to begin installation, 'q' to quit,
'r' to refresh]: 8
You are now at the Installation Summary screen. You can customize your Rocky Linux 9 installation from here.
Press '8' to set root password.
================================================================================
Root password

Please select new root password. You will have to type it twice.

Password:
Password (confirm):

================================================================================
================================================================================
Installation

1) [x] Language settings                 2) [x] Time settings
       (English (United States))                (America/New_York timezone)
3) [x] Installation source               4) [x] Software selection
       (Local media)                            (Minimal Install)
5) [!] Installation Destination          6) [x] Kdump
       (Automatic partitioning                  (Kdump is enabled)
       selected)
7) [x] Network configuration             8) [x] Root password
       (Wired (enp1s0) connected)               (Root password is set)
9) [ ] User creation
       (No user will be created)

Please make a selection from the above ['b' to begin installation, 'q' to quit,
'r' to refresh]:  5
Now press '5' to Configure Hard Disk and Partitions of your KVM virtual machine.
Probing storage...
================================================================================
================================================================================
Installation Destination

1) [x] DISK: 20 GiB (vda)

1 disk selected; 20 GiB capacity; 20 GiB free

Please make a selection from the above ['c' to continue, 'q' to quit, 'r' to
refresh]: c
================================================================================
================================================================================
Partitioning Options

1) [ ] Replace Existing Linux system(s)
2) [x] Use All Space
3) [ ] Use Free Space
4) [ ] Manually assign mount points

Installation requires partitioning of your hard drive. Select what space to use
for the install target or manually assign mount points.

Please make a selection from the above ['c' to continue, 'q' to quit, 'r' to
refresh]: c
================================================================================
================================================================================
Partition Scheme Options

1) [ ] Standard Partition
2) [x] LVM
3) [ ] LVM Thin Provisioning

Select a partition scheme configuration.

Please make a selection from the above ['c' to continue, 'q' to quit, 'r' to
refresh]: c
Saving storage configuration...
Checking storage configuration...

================================================================================
================================================================================
Installation

1) [x] Language settings                 2) [x] Time settings
       (English (United States))                (America/New_York timezone)
3) [x] Installation source               4) [x] Software selection
       (Local media)                            (Minimal Install)
5) [x] Installation Destination          6) [x] Kdump
       (Automatic partitioning                  (Kdump is enabled)
       selected)
7) [x] Network configuration             8) [x] Root password
       (Wired (enp1s0) connected)               (Root password is set)
9) [ ] User creation
       (No user will be created)

Please make a selection from the above ['b' to begin installation, 'q' to quit,
'r' to refresh]: b
Press 'b' to begin Rocky Linux 9 installation.
================================================================================
================================================================================
Progress

.
Setting up the installation environment
Configuring storage
Creating disklabel on /dev/vda
Creating xfs on /dev/vda1
Creating lvmpv on /dev/vda2
...
...
...
...
Configuring addons
.
Generating initramfs
...
Storing configuration files and kickstarts
.
Running post-installation scripts
.
Installation complete

Use of this product is subject to the license agreement found at:
/usr/share/rocky-release/EULA

Installation complete. Press ENTER to quit:
After reboot, the KVM guest machine will provide you the Linux CLI login prompt.
Login as root user and execute some test commands.
Rocky Linux 9.0 (Blue Onyx)
Kernel 5.14.0-70.13.1.el9_0.x86_64 on an x86_64

localhost login: root
Password:
Last failed login: Tue Aug  9 08:06:43 EDT 2022 on ttyS0
There was 1 failed login attempt since the last successful login.
# ip a | grep "inet "
    inet 127.0.0.1/8 scope host lo
    inet 192.168.122.25/24 brd 192.168.122.255 scope global dynamic noprefixroute enp1s0

# poweroff
dracut Warning: Unmounted /oldroot.
[  213.159797] dracut: Disassembling device-mapper devices
Powering off.
[  213.194994] kvm: exiting hardware virtualization
[  213.229673] ACPI: PM: Preparing to enter system sleep state S5
[  213.235358] reboot: Power down
Install Cockpit Web UI on Rocky Linux 9:
Besides virt-manager and Linux CLI, you can also use Cockpit Web UI to manage your KVM virtualization host.
Install cockpit and required virtualization plugin as follows.
# dnf install -y cockpit cockpit-machinesEnable and start Cockpit service.
# systemctl enable --now cockpit.socket
Created symlink /etc/systemd/system/sockets.target.wants/cockpit.socket → /usr/lib/systemd/system/cockpit.socket.
Cockpit service is by-default allowed in Rocky Linux 9 firewall.
Open URL https://kvm-01.centlinux.com:9090/ in a web browser.
The Cockpit uses a self-signed SSL certificate, therefore, you may see a Security warning.
Ignore the Security warning and continue to the website.
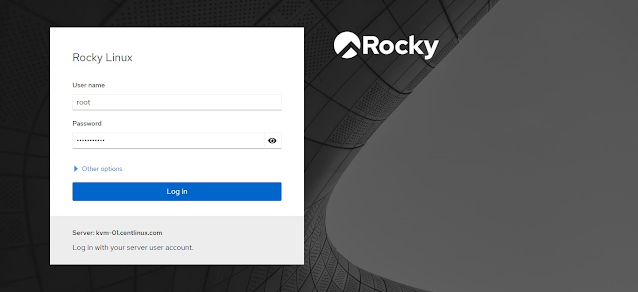
Login to Cockpit Web UI as root user.
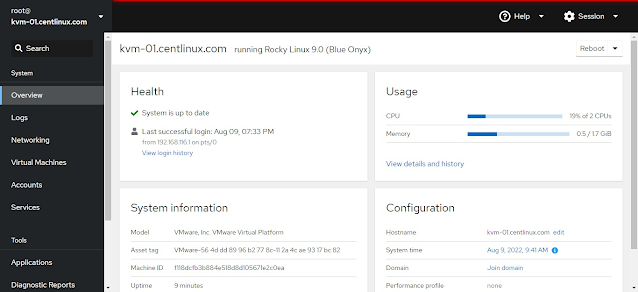
Click on the Virtual Machines from the left side-pane.

You are now at the Virtual Machines page. You can manage our KVM virtualization host from here.
Read Also:
Install Cockpit Web UI on Rocky Linux 8
Install Cockpit Web UI on CentOS 7
Conclusion:
You have successfully installed KVM virtualization host on Rocky Linux 9. For further studies, please read Foundations of Libvirt Development by Apress.
'컴퓨터 활용(한글, 오피스 등) > 50_2.운영체제_리눅스' 카테고리의 다른 글
| 리눅스_ansible_[Ubuntu] ansible 설치하고 연결하기 (0) | 2023.04.27 |
|---|---|
| [Ansible] 앤서블(Ansible) 개념과 설치/사용법 (w/ CentOS 7.6) (0) | 2023.04.27 |
| CentOS 8에서 Rocky Linux로 이관 (0) | 2023.04.25 |
| 리눅스_CentOS 8 무선랜 설정하기 (0) | 2023.04.13 |
| 리눅스_vim rc 환경설정 (0) | 2023.04.11 |


