출처: https://www.linuxtuto.com/how-to-install-drupal-9-on-ubuntu-22-04/
Drupal is an open-source and popular content management tool that is the foundation of many websites across the internet. It has great standard features, like easy content authoring, reliable performance, and excellent security. Flexibility and modularity are some of the core principles that set it apart from the rest.
In this tutorial, we will show you how to install Drupal 9 on your Ubuntu 22.04 OS.
Step 1: Update Operating System
Update your Ubuntu 22.04 operating system to make sure all existing packages are up to date:
$ sudo apt update && sudo apt upgrade -yStep 2: Install Apache webserver
You can install Apache via apt package manager by executing the following command.
$ sudo apt install apache2You can start the Apache service and configure it to run on startup by entering the following commands:
$ sudo systemctl start apache2
$ sudo systemctl enable apache2
Verify the status of the Apache service using systemctl status command:
$ sudo systemctl status apache2Output:
● apache2.service - The Apache HTTP Server
     Loaded: loaded (/lib/systemd/system/apache2.service; enabled; vendor preset: enabled)
     Active: active (running)
       Docs: https://httpd.apache.org/docs/2.4/
    Process: 3170 ExecStart=/usr/sbin/apachectl start (code=exited, status=0/SUCCESS)
   Main PID: 3174 (apache2)
      Tasks: 12 (limit: 2200)
     Memory: 246.8M
        CPU: 18.104s
     CGroup: /system.slice/apache2.service
             ├─3174 /usr/sbin/apache2 -k start
             ├─3175 /usr/sbin/apache2 -k start
             ├─3176 /usr/sbin/apache2 -k start
You can test to make sure everything is working correctly by navigating to:
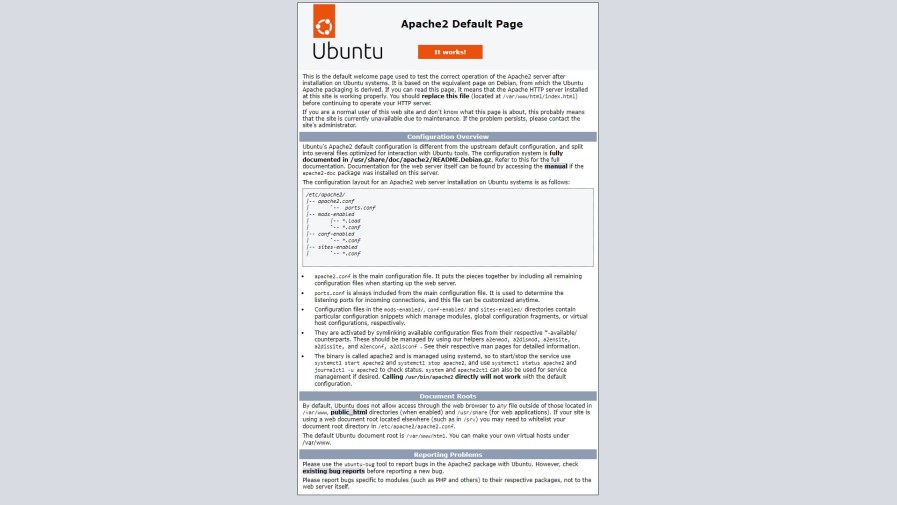
http://your-IP-addressIf everything is configured properly, you should be greeted by the default Apache2 Page, as seen below.
Step 3: Install PHP and PHP extensions for Drupal 9
By default, Ubuntu 22.04 comes with PHP version 8.1. You can install PHP and other supporting packages using the following command:
$ sudo apt install php libapache2-mod-php php-dev php-bcmath php-intl php-soap php-zip php-curl php-mbstring php-mysql php-gd php-xmlVerify if PHP is installed.
php -vOutput:
PHP 8.1.6 (cli) (built: May 17 2022 16:46:54) (NTS)
Copyright (c) The PHP Group
Zend Engine v4.1.6, Copyright (c) Zend Technologies
with Zend OPcache v8.1.6, Copyright (c), by Zend Technologies
Step 4: Install MySQL and create a database
You can install MySQL with the following command:
$ sudo apt install mysql-serverStart the database server daemon, and also enable it to start automatically at the next boot with the following commands:
$ systemctl start mysql
$ systemctl enable mysql
Verify the status of the MySQL service using systemctl status command:
$ sudo systemctl status mysqlOutput:
● mysql.service - MySQL Community Server
     Loaded: loaded (/lib/systemd/system/mysql.service; enabled; vendor preset: enabled)
     Active: active (running)
    Process: 832 ExecStartPre=/usr/share/mysql/mysql-systemd-start pre (code=exited, status=0/SUCCESS)
   Main PID: 1235 (mysqld)
     Status: "Server is operational"
      Tasks: 46 (limit: 2200)
     Memory: 582.6M
        CPU: 1min 11.087s
     CGroup: /system.slice/mysql.service
             └─1235 /usr/sbin/mysqld
Once the database server is installed, log into the MariaDB prompt:
$ sudo mysql -u rootTo create a database, database user, and grant all privileges to the database user run the following commands:
mysql> CREATE DATABASE drupal;
mysql> CREATE USER 'drupal_user'@'localhost' IDENTIFIED BY 'Drupal_Passw0rd!';
mysql> GRANT ALL ON drupal.* TO 'drupal_user'@'localhost';
mysql> FLUSH PRIVILEGES;
mysql> EXIT
예시: CREATE USER 'drupal_user'@'localhost' IDENTIFIED BY 'drupal';
Step 5: Download Drupal 9
We will now download Drupal 9 from the Drupal Official site.
Use the following command to download Drupal 9:
$ sudo wget https://ftp.drupal.org/files/projects/drupal-9.3.13.zipExtract file into the folder /var/www/html/ with the following command:
$ sudo apt -y install unzip
$ sudo unzip drupal-9.3.13.zip -d /var/www/html/
To make things simpler, rename the extracted directory drupal-9.3.13 to just drupal:
$ sudo mv /var/www/html/drupal-9.3.13/ /var/www/html/drupal/Enable permission for the Apache webserver user to access the files,
$ sudo chown -R www-data:www-data /var/www/html/drupal/Step 6: Configure Apache Web Server for Drupal 9
Navigate to /etc/apache2/sites-available directory and run the following command to create a configuration file for your installation:
$ sudo nano /etc/apache2/sites-available/drupal.confAdd the following content:
<VirtualHost *:80>
     ServerAdmin webmaster@your-domain.com
     ServerName  example.com
     ServerAlias www.example.com
     DocumentRoot /var/www/html/drupal/

     ErrorLog ${APACHE_LOG_DIR}/error.log
     CustomLog ${APACHE_LOG_DIR}/access.log combined

     <Directory /var/www/html/drupal/>
            Options FollowSymlinks
            AllowOverride All
            Require all granted
     </Directory>

     <Directory /var/www/html/>
            RewriteEngine on
            RewriteBase /
            RewriteCond %{REQUEST_FILENAME} !-f
            RewriteCond %{REQUEST_FILENAME} !-d
            RewriteRule ^(.*)$ index.php?q=$1 [L,QSA]
    </Directory>
</VirtualHost>
Save the file and Exit.
Enable the Drupal 9 virtual host:
$ sudo a2ensite drupal.confAfter that, restart the Apache web server.
$ sudo systemctl restart apache2Step 7: Access Drupal 9 Web Installer
Open your browser type your domain e.g http://your-domain.com and complete the required steps to finish the installation.

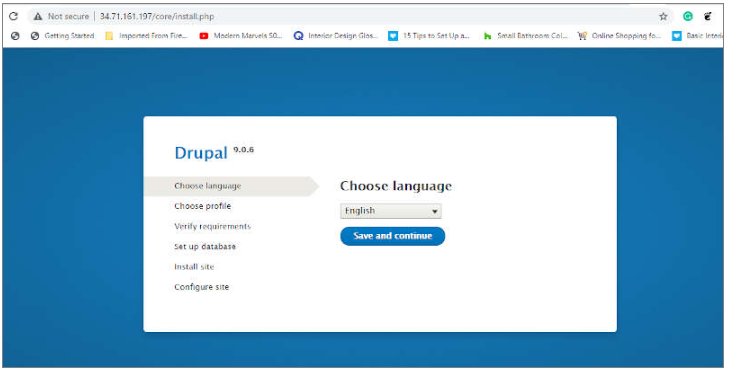
Choose your preferred language and hit Save and continue, you will get the following screen:
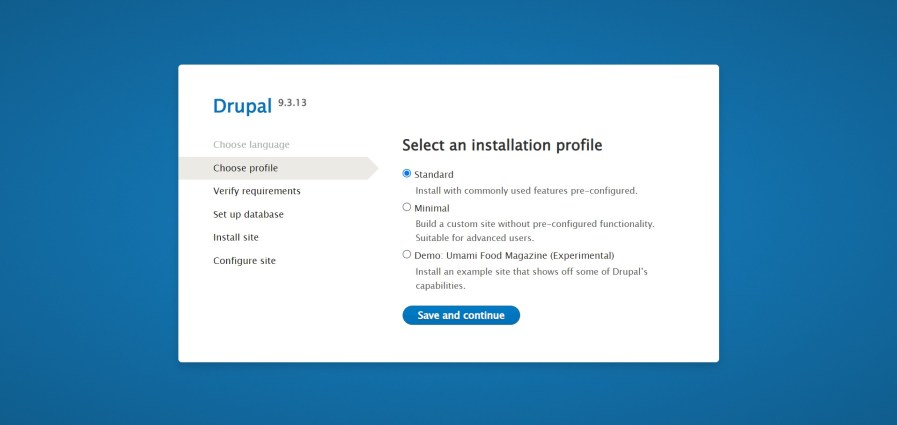
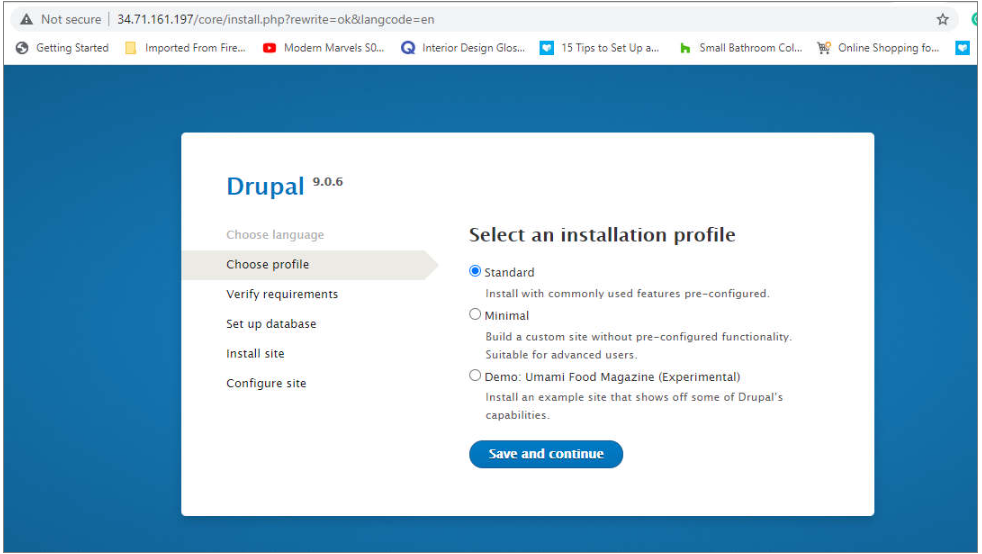
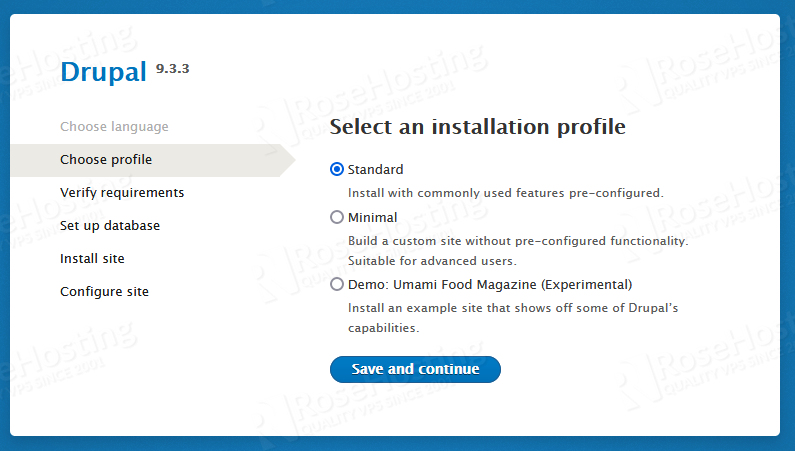
Choose Standard and hit Save and continue. You will get the following screen:
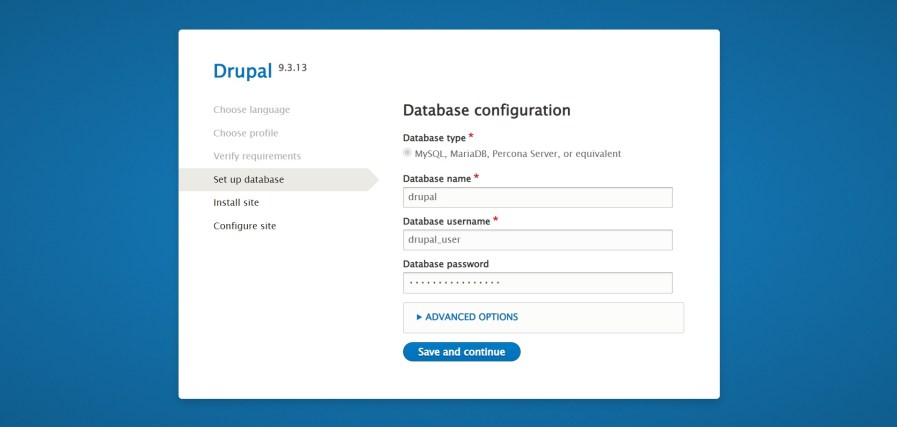
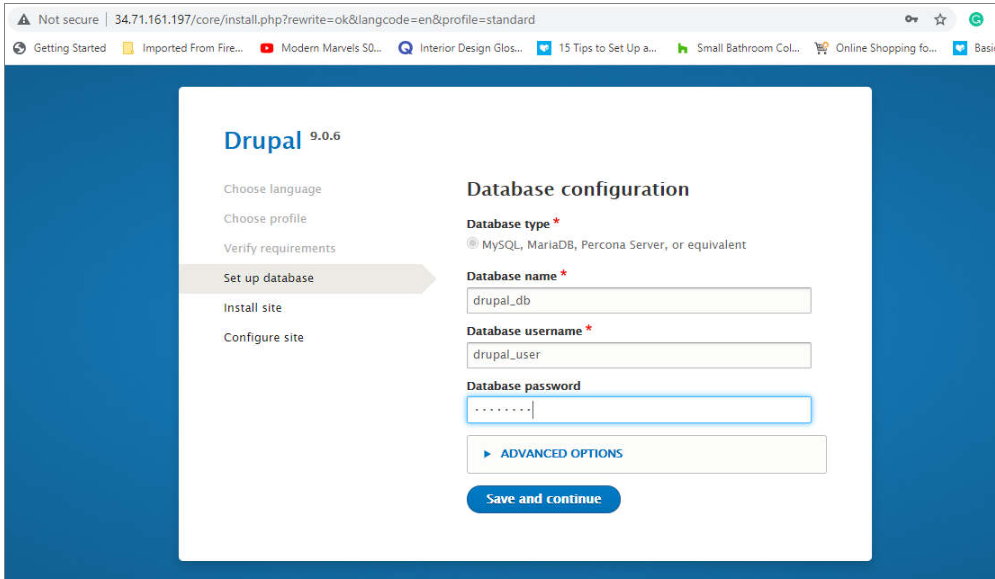
Fill in your database settings and hit Save and continue.
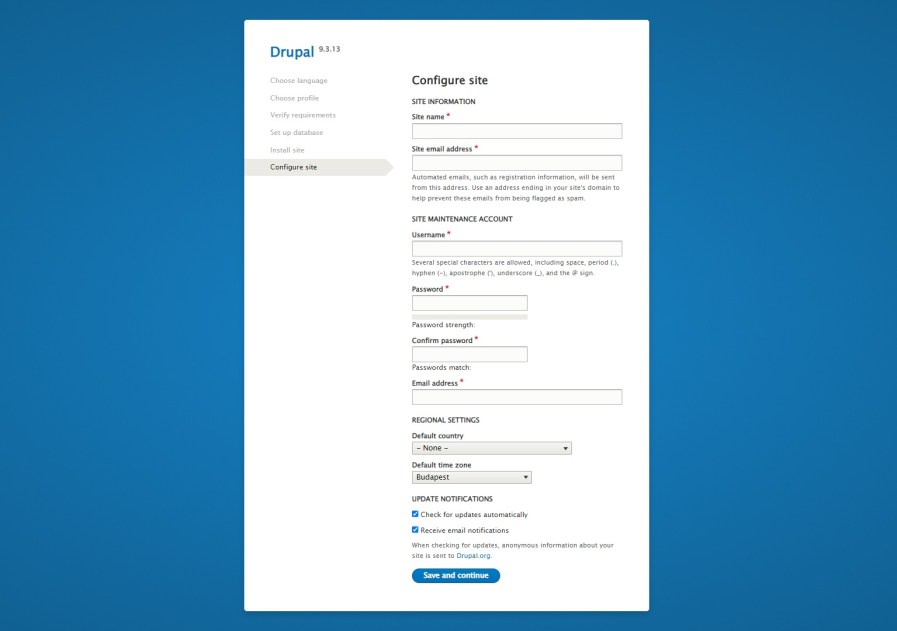
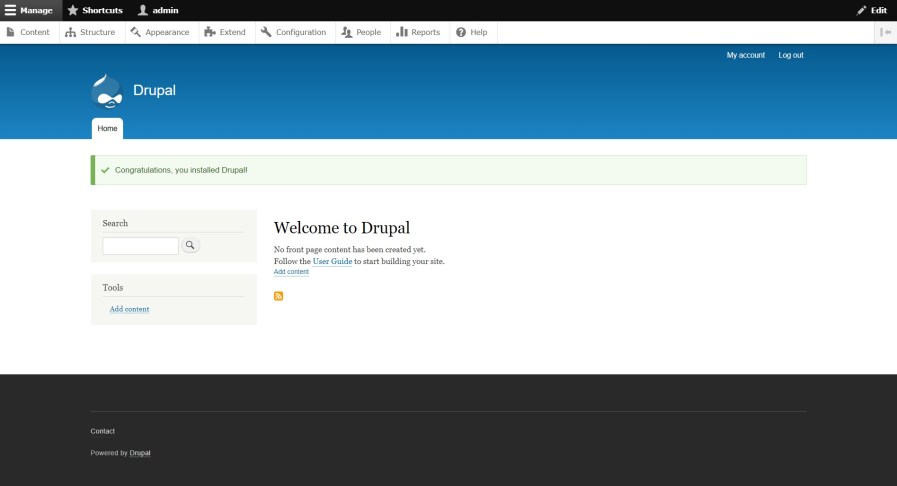
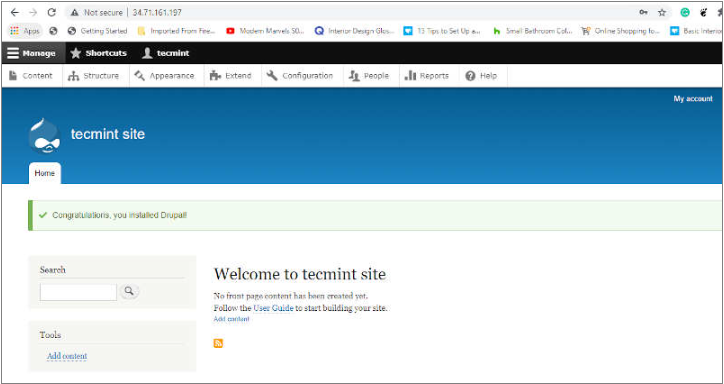
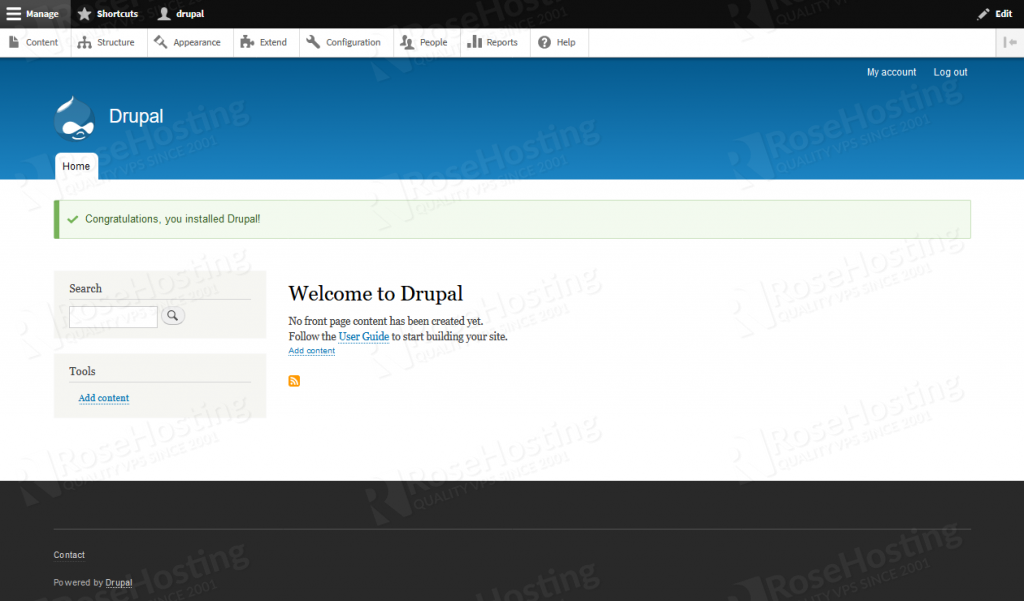
Fill in some basic information about your site and then hit Save and continue. You will get the dashboard in the following screen:
Installation of Drupal has been completed. Now revert the permissions for the settings.php file:
$ sudo chmod 644 /var/www/html/drupal/sites/default/settings.phpComments and Conclusion
That’s it. You have successfully installed Drupal 9 on Ubuntu 22.04
If you have any questions please leave a comment below.
[재설치] ----------------------------------------------------------------------------------------------
Drupal reinstall
출처: https://devkyu.tistory.com/855
드루팔을 재설치 하면서 겪은 경험
어느 날, 드루팔이 공격을 당하고 있다.. 라는 기사를 봤다.
그래서 코어 업데이트를 해보는 도중 update에 막혀서 그냥 드루팔을 다시 설치하기록 했다.
1. 백업 겸 폴더 삭제
어떤 것이든 변경하거나 설치할 때는 백업을 해두는 습관을 들이자.
내가 코어를 밀려다가 드루팔을 다시 설치하는 이유도 백업을 하지 않은 상태로 rm으로 다 날려먹어서 그렇다.
$ mkdir -p /tmp/backup/drupal
$ cd [drupal path]
$ cd ..
$ mv [drupal folder] /tmp/backup/drupal/drupal.backup.190306
2. mySQL database삭제
mysql에 drupal install 정보가 들어있어서 제거하지 않으면 계속 다시 자동으로 설치가 된다.
$ mysql -p
... in mysql
use drupal
show tables;
drop database drupal;
3. 다시 처음부터 드루팔 설치
이제부터 다시 처음부터 설치를 하면 된다.
https://devkyu.tistory.com/821
설치할 때 주의할 점은 드루팔 폴더의 소유자를 www-data로 바꾸는 건데 아래처럼 하면 된다.
안하면 언어 폴더가 없다나 뭐라나 에러가 뜬다.
sudo chown -R www-data.www-data .
-----------------------------------------------------
Debian 및 Ubuntu에서 Apache와 함께 Drupal을 설치하는 방법
출처: https://ko.linux-console.net/?p=1195#gsc.tab=0
웹 사이트를 처음부터 개발하는 것은 어려운 작업이 될 수 있습니다. 개발자를 고용하려는 경우 시간과 비용이 많이 듭니다. 블로그 나 웹 사이트를 시작하는 쉬운 방법은 Drupal과 같은 CMS (콘텐츠 관리 시스템)를 사용하는 것입니다.
Drupal은 오픈 소스 콘텐츠 관리 시스템 (CMS)으로 PHP로 작성되고 GPL로 출시되었습니다. 개인 블로그, 기업 웹 사이트 및 사람들이 필요할 수있는 모든 종류의 웹 사이트를 지원하기 위해 2001 년 1 월에 처음 출시되었습니다. 오늘날 Drupal은 전 세계적으로 수백만 개의 웹 사이트를 운영하는 세계에서 가장 유명한 CMS 중 하나입니다.
이 가이드 작성 당시 최신 버전의 Drupal은 Drupal 9입니다.
- Free and open-source.
- Basic features like the ability to publish posts, pages, and a comment system, RSS feed, user registration. install and modify templates & add-ons.
- More than 30000 available modules to download for free from the Drupal store.
- Available in more than 110 languages with support for RTL languages like Arabic.
- Multi-site support and Multi-user content editing and creation support.
- Support for creating blogs, forums, polls using modules that are installed by default.
- Very-well updates system to notify you about security updates.
- Many other features.
이 가이드에서는 Debian 10/9 및 Ubuntu 20.04/18.04에 Drupal을 설치합니다.
Drupal은 사용자가 프런트 엔드에서 액세스하는 PHP 기반 CMS이므로 Debian/Ubuntu 인스턴스에 LAMP 스택을 설치해야합니다. LAMP는 웹 사이트를 테스트하고 배포하는 데 사용되는 소프트웨어 스택이며 3 가지 주요 구성 요소로 구성됩니다.
- Apache webserver.
- MariaDB database server.
- PHP (For Drupal 9, PHP 7.3 and later versions is recommended).
요구 사항이 충족 되었으면 시작하겠습니다!
1 단계 : Apache, MariaDB 및 PHP 설치
1. Drupal을 설치하려면 실행중인 웹 서버와 데이터베이스 서버가 필요합니다.이 기사에서는 Apache, PHP 및 MariaDB를 사용합니다. apt라는 패키지 관리자 도구를 사용하여 쉽게 설치할 수 있습니다.
$ sudo apt install apache2 mariadb-server mariadb-client php libapache2-mod-php php-cli php-fpm php-json php-common php-mysql php-zip php-gd php-intl php-mbstring php-curl php-xml php-pear php-tidy php-soap php-bcmath php-xmlrpc

2. 프로덕션 서버에서 MariaDB 패키지와 함께 제공되는 다음 보안 스크립트를 실행하여 MariaDB 데이터베이스 설치에 대한 몇 가지 기본 보안 조치를 활성화해야합니다.
$ sudo mysql_secure_installation
스크립트를 실행 한 후에는 \u003ccode\u003e yes (y) \u003c/ code\u003e에 답하여 표시된대로 몇 가지 기본 보안 옵션을 활성화 할 수있는 일련의 질문을 안내합니다.
- Enter current password for root (enter for none): Enter
- Set a root password? [Y/n] y
- Remove anonymous users? [Y/n] y
- Disallow root login remotely? [Y/n] y
- Remove test database and access to it? [Y/n] y
- Reload privilege tables now? [Y/n] y

이것으로 모든 필수 패키지를 성공적으로 설치하고 MySQL 비밀번호도 추가했습니다. 이제 드루팔 설치를위한 데이터베이스를 만들 차례입니다.
2 단계 : Drupal 데이터베이스 생성
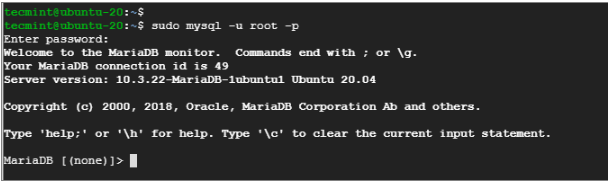
3. Drupal 설치를위한 데이터베이스를 만들어야합니다. 이렇게하려면 다음 명령을 실행하여 mysql 셸에 연결합니다.
$ sudo mysql -u root -p
참고 : MySQL 패키지를 보호하는 동안 설정 한 MySQL 루트 비밀번호를 입력하라는 메시지가 표시됩니다. 입력하면 mysql 터미널에 메시지가 표시됩니다.
4. 다음으로 MySQL 터미널에서 다음과 같은 일련의 명령을 실행하여 새로운 'drupal‘사용자, 데이터베이스 및 권한 부여를 생성합니다.
## Creating New User for Drupal Database ##
MariaDB [(none)]> CREATE USER drupal@localhost IDENTIFIED BY "your_password_here";

## Create New Database ##
MariaDB [(none)]> create database drupal;

## Grant Privileges to Database ##
MariaDB [(none)]> GRANT ALL ON drupal.* TO drupal@localhost;

## FLUSH privileges ##
MariaDB [(none)]> FLUSH PRIVILEGES;

## Exit ##
MariaDB [(none)]> exit
참고 : 원하는 경우 사용자 이름과 데이터베이스 이름을 다른 이름으로 바꿀 수 있습니다.
3 단계 : Ubuntu에서 Drupal 다운로드 및 설치
5. Drupal은 공식 Ubuntu/Debian 리포지토리에서 패키지로 다운로드 할 수 있지만, 보안 취약점이 많은 Drupal의 이전 버전이며 현재 Drupal 버전은 9.0.6입니다. 따라서 다운로드 할 예정입니다. "공식 웹 사이트의 Drupal
또는 다음 wget 명령을 사용하여 최신 버전을 직접 가져올 수 있습니다.
$ sudo wget https://www.drupal.org/download-latest/tar.gz -O drupal.tar.gz
6. 다음으로 tarball 파일의 압축을 풀고 압축되지 않은 drupal 폴더를 그림과 같이 \u003ccode\u003e/var/www/html \u003c/ code\u003e 경로로 이동합니다.
$ sudo tar -xvf drupal.tar.gz
$ sudo mv drupal-9.0.6 /var/www/html/drupal
7. drupal에 액세스하려면 표시된 권한을 할당합니다.
$ sudo chown -R www-data:www-data /var/www/html/drupal/
$ sudo chmod -R 755 /var/www/html/drupal/
4 단계 : Apache Drupal 가상 호스트 생성
8. 구성의 마지막 부분에서는 Drupal 웹 사이트를위한 Apache 가상 호스트 파일을 생성해야합니다. 계속해서 다음과 같이 가상 호스트 파일을 만듭니다.
$ sudo vim /etc/apache2/sites-available/drupal.conf
아래 내용을 붙여 넣으세요.
<VirtualHost *:80>
     ServerAdmin [email protected]
     DocumentRoot /var/www/html/drupal/
     ServerName  example.com
     ServerAlias www.example.com

     ErrorLog ${APACHE_LOG_DIR}/error.log
     CustomLog ${APACHE_LOG_DIR}/access.log combined

     <Directory /var/www/html/drupal/>
            Options FollowSymlinks
            AllowOverride All
            Require all granted
     </Directory>

     <Directory /var/www/html/>
            RewriteEngine on
            RewriteBase /
            RewriteCond %{REQUEST_FILENAME} !-f
            RewriteCond %{REQUEST_FILENAME} !-d
            RewriteRule ^(.*)$ index.php?q=$1 [L,QSA]
    </Directory>
</VirtualHost>
그런 다음 구성 파일을 저장하고 종료하십시오.
9. 가상 호스트가 제자리에 있으면 아래 명령을 사용하여 활성화해야합니다.
$ sudo a2ensite drupal.conf
$ sudo a2enmod rewrite
10. 그런 다음 Apache 웹 서버를 다시 시작하여 변경 사항을 적용합니다.
$ sudo systemctl restart apache2
6 단계 : 브라우저에서 Drupal 설정
11.이 단계에서는 웹 브라우저에서 설정하여 Drupal의 설치를 마무리합니다. 따라서 브라우저를 시작하고 다음과 같이 서버의 IP 주소로 이동합니다.
http://www.server-ip/
OR
http://www.example.com/
12. 나타나는 페이지에서 원하는 언어를 선택하고 '저장하고 계속하기'버튼을 클릭합니다.
13. 다음 단계에서는 활용할 수있는 3 개의 설치 프로필을 제공합니다. 문제를 쉽고 간단하게 유지하려면 표준 프로필 인 첫 번째 옵션을 선택하고 '저장하고 계속하기'버튼을 누르십시오.
14. 다음 단계에서 데이터베이스 세부 정보를 입력합니다.
15. 곧 필요한 모든 파일의 설치가 시작됩니다. 약 5 분이 소요되며 약간의 인내심이 필요합니다.

16. 사이트 이름, 사이트 이메일 주소, 위치 및 시간대와 같은 사이트에 대한 모든 필수 필드를 채우십시오.

17. 마지막으로 다음과 같이 Drupal의 기본 대시 보드가 표시됩니다.
여기에서 사용 가능한 테마를 사용하거나 프리미엄 Drupal 테마를 활용하여 자신 만의 반응적이고 우아한 웹 사이트를 만들 수 있습니다. "이것이 오늘 우리가 가진 전부입니다. "Debian 10/9 및 Ubuntu 20.04/18.04에서 Drupal을 편안하게 설정할 수 있기를 바랍니다.
-------------------------------------------------------------------------
How To Install Drupal 9 CMS on Ubuntu 20.04
Drupal is open-source software that has many features, like easy content authoring, reliable performance, and excellent security. With Drupal tools, you can build the versatile, structured content that dynamic web experiences need. As an open-source web content management system (CMS) written in PHP, it is a great alternative to another CSM like WordPress or Joomla. In this tutorial, we will show you how to install Drupal 9 on Ubuntu 20.04 (Focal Fossa).
Prerequisites
- Ubuntu 20.04
- root SSH access or a regular user with sudo privileges
1. Log in via SSH and update the system
Log in to your Ubuntu 20.04 VPS with SSH as a root user or as a regular user with sudo privileges
ssh master@IP_Address -p Port_numberRemember to replace IP_Address and Port_Number with your server’s actual IP address and SSH port number respectively.
You can check whether you have the proper Ubuntu version installed on your server with the following command:
$ lsb_release -aYou should get this output:
No LSB modules are available.
Distributor ID: Ubuntu
Description: Ubuntu 20.04.3 LTS
Release: 20.04
Codename: focal
Then, run the following command to make sure that all installed packages on the server are updated to the latest available version
$ sudo apt update && sudo apt upgrade2. Install and Configure Web server
Drupal 9 supports many webservers, like Apache, nginx, LiteSpeed, even Microsoft IIS. In this tutorial, we will show you how to install Drupal 9 using apache or nginx on your Ubuntu 20.04. Drupal will be installed in directory /var/www/html/drupal. For this purpose, we need to create the directory.
$ sudo mkdir /var/www/html/drupala. apache
If you want to use Apache, run this command to install it from the repository.
$ sudo apt install apache2Once installed, Apache will run and we can start creating a virtual host.
$ sudo nano /etc/apache2/sites-available/drupal.confPaste the following in to /etc/apache2/sites-available/drupal.conf file.
<VirtualHost *:80>
     ServerName drupal.rosehosting.com
     ServerAlias drupal.rosehosting.com
     ServerAdmin admin@otodiginet.com
     DocumentRoot /var/www/html/drupal/

     CustomLog ${APACHE_LOG_DIR}/access.log combined
     ErrorLog ${APACHE_LOG_DIR}/error.log

      <Directory /var/www/html/drupal>
            Options Indexes FollowSymLinks
            AllowOverride All
            Require all granted
            RewriteEngine on
            RewriteBase /
            RewriteCond %{REQUEST_FILENAME} !-f
            RewriteCond %{REQUEST_FILENAME} !-d
            RewriteRule ^(.*)$ index.php?q=$1 [L,QSA]
      </Directory>
</VirtualHost>
Save the file then exit from nano editor. To enable the virtual host, let’s run this command:
$ sudo a2ensite drupalAs you can see in the Apache virtual host above, it contains RewriteRule. By default, the Apache mod rewrite in Ubuntu is not enabled. So, we need to enable the module and restart Apache.
$ sudo a2enmod rewrite$ sudo systemctl restart apache2b. nginx
If you want to use nginx instead of apache, run this command to install it.
$ sudo apt install nginxNow, let’s create an nginx server block to proceed with Drupal 9 installation.
$ sudo nano /etc/nginx/sites-enabled/drupal.confPaste the following contents in to the file
server {
    listen 80;

    root /var/www/html/drupal;

    index index.php index.html index.htm;

    server_name drupal.rosehosting.com;

    location / {
        try_files $uri $uri/ /index.php$is_args$args;
    }

    location = /favicon.ico { log_not_found off; access_log off; }
    location = /robots.txt { log_not_found off; access_log off; allow all; }
    location ~* \.(css|gif|ico|jpeg|jpg|js|png)$ {
        expires max;
        log_not_found off;
    }

    location ~ \.php$ {
        try_files $uri =404;
        fastcgi_split_path_info ^(.+\.php)(/.+)$;
        fastcgi_pass unix:/var/run/php/php7.4-fpm.sock;
        fastcgi_index index.php;
        fastcgi_param SCRIPT_FILENAME $document_root$fastcgi_script_name;
        include fastcgi_params;
    }
}
Save the file then exit.
3. Install Database Server
Drupal 9 requires MariaDB 10.3+ or MySQL/Percona 5.7.8+ or higher, PostgreSQL 10.0 or higher, SQLite 3.26 or higher, the database server is needed to store your Drupal data. In this step, we will install MariaDB from Ubuntu repository.
Run the following command to install the MariaDB server from the official Ubuntu repositories:
$ sudo apt install mariadb-server mariadb-client -yOnce installed, MariaDB will run and it’s already configured to run after reboot, by default.
Next, secure the MariaDB installation using the following command:
$ sudo mysql_secure_installationThis script will set the MariaDB root password, disable remote root login and remove anonymous users as shown below:
Enter current password for root (enter for none):
Set root password? [Y/n] Y
New password:
Re-enter new password:
Remove anonymous users? [Y/n] Y
Disallow root login remotely? [Y/n] Y
Remove test database and access to it? [Y/n] Y
Reload privilege tables now? [Y/n] Y
4. Create a Database
Login to the MySQL cli as the root user and execute the following commands:
$ mysql -u root -pYou will be prompted for your MySQL root password, you create the password in the previous step. And, once logged in, run these commands.
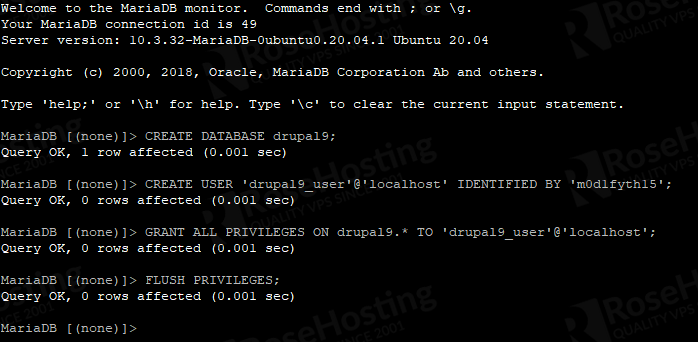
mysql> CREATE DATABASE drupal9;
mysql> CREATE USER 'drupal9_user'@'IP_address' IDENTIFIED BY 'm0d1fyth15';
mysql> GRANT ALL PRIVILEGES ON wp.* TO 'drupal9_user'@'IP_address';
mysql> FLUSH PRIVILEGES;
mysql> \q
Make sure to replace the ‘IP_address‘ is the IP address of your Ubuntu 20.04 server where Drupal 9 will be installed, or you can also use ‘localhost’. Do not forget to replace the PASSWORD ‘m0d1fyth15’ with a stronger and unique one.
5. Install PHP
In this section, we will install PHP 7.4. Rung the command below to install PHP 7.4
$ sudo apt install php7.4 libapache2-mod-php7.4 php7.4-{common,mbstring,xmlrpc,soap,gd,xml,intl,mysql,cli,zip,curl,fpm} -yIf you choose to use Apache, run this command and restart Apache.
$ sudo a2enmod php7.4
$ sudo systemctl restart apache2
If you choose nginx, simply restart nginx after installing PHP 7.4
$ sudo systemctl restart nginx6. Install Drupal 9
In this section, we will download and install Drupal 9. At the time of writing this blog post, Drupal 9.3.3 is the latest version, you can check it at their release page at https://www.drupal.org/project/drupal. According to their documentation, this Drupal version 9.3.x will receive security coverage until December 8, 2022.
$ cd /var/www/html
$ sudo wget https://ftp.drupal.org/files/projects/drupal-9.3.3.tar.gz
Once downloaded, we need to extract the compressed file.
$ sudo tar xzvf drupal-9.3.3.tar.gz -C /var/www/html/drupal --strip-components=1Then, change the permissions.
$ sudo chown -R www-data. /var/www/html/drupalNavigate to http://yourdrupaldomain.com and initiate the installation.
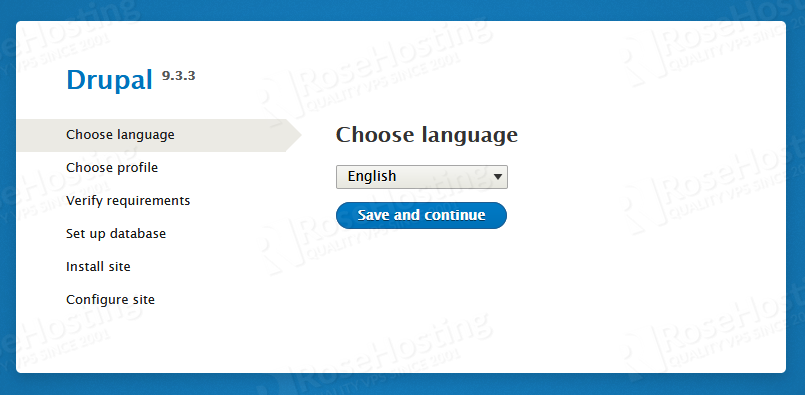
Choose your desired language then click on the save and continue button.

Once completed, you will be brought to the last step to configure your Drupal website.
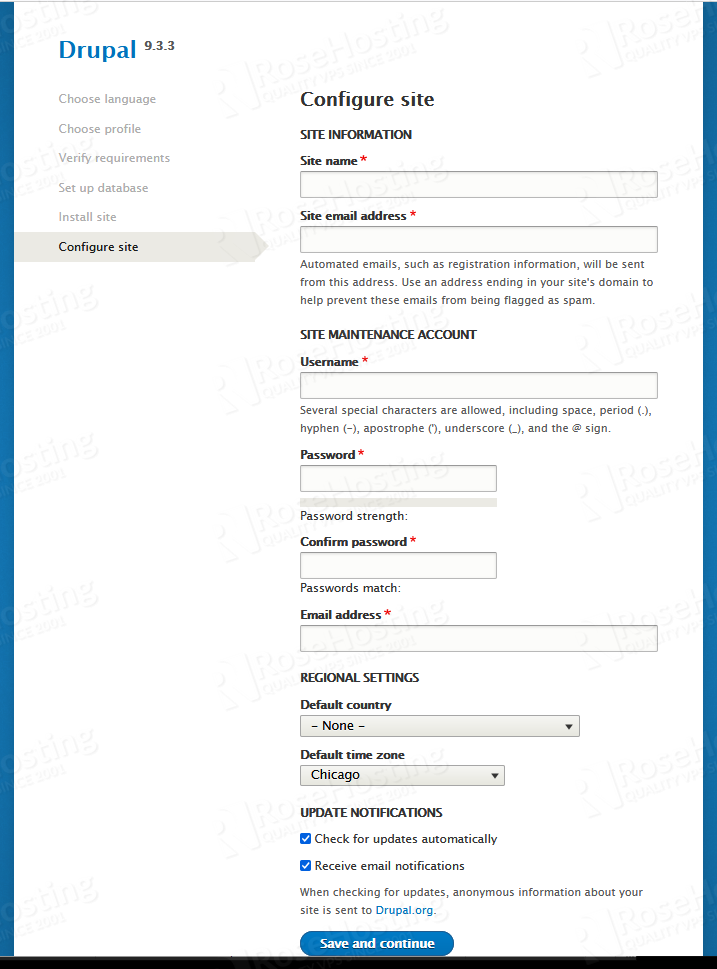
Fill the details then click on the save and continue button to finalize the installation. And that’s it, you will be automatically redirected to your Drupal website’s backend.
7. Install Free SSL Certificate
In this modern era, it is recommended to secure your website with an SSL certificate. This is not a mandatory step, but it provides secure connections for your Drupal instance.
First, install the Certbot client in your system to manage the SSL:
$ apt install python3-certbot-apache python3-certbot-nginxDepends on what your webserver is, you can run one of these commands.
$ sudo certbot --apache
$ sudo certbot --nginx
Follow the steps when installing a free SSL certificate from Let’s Encrypt. You would see the output similar to this:
master@ubuntu20:~# sudo certbot --apache
Saving debug log to /var/log/letsencrypt/letsencrypt.log
Plugins selected: Authenticator apache, Installer apache
Enter email address (used for urgent renewal and security notices) (Enter 'c' to
cancel):

- - - - - - - - - - - - - - - - - - - - - - - - - - - - - - - - - - - - - - - -
Please read the Terms of Service at
https://letsencrypt.org/documents/LE-SA-v1.2-November-15-2017.pdf. You must
agree in order to register with the ACME server at
https://acme-v02.api.letsencrypt.org/directory
- - - - - - - - - - - - - - - - - - - - - - - - - - - - - - - - - - - - - - - -
(A)gree/(C)ancel: a
There seem to be problems with that address. Enter email address (used for
urgent renewal and security notices)

- - - - - - - - - - - - - - - - - - - - - - - - - - - - - - - - - - - - - - - -
Would you be willing to share your email address with the Electronic Frontier
Foundation, a founding partner of the Let's Encrypt project and the non-profit
organization that develops Certbot? We'd like to send you email about our work
encrypting the web, EFF news, campaigns, and ways to support digital freedom.
- - - - - - - - - - - - - - - - - - - - - - - - - - - - - - - - - - - - - - - -
(Y)es/(N)o: n

- - - - - - - - - - - - - - - - - - - - - - - - - - - - - - - - - - - - - - - -
Choose the domain/subdomain your are installing Drupal 9 for, and certbot will install the SSL certificate for it. You can also choose whether to redirect the HTTP traffic to HTTPS or not.
That’s it! You have successfully installed Drupal 9 on your Ubuntu 20.04 machine.
Of course, you don’t have to install Drupal 9 on your Ubuntu 20.04 server if you have a server with us, in which case you can simply ask our expert Linux hosting admins to set all of this up for you, quickly and easily. They are available 24×7 and will respond to your request immediately.
PS. If you liked this post, please share it with your friends on the social networks using the buttons below, or simply leave a comment down in the comments section. Thank you.
'컴퓨터 활용(한글, 오피스 등) > 50_2.운영체제_리눅스' 카테고리의 다른 글
| 리눅스_drupal 설치_Port in a micro site URL not supported (0) | 2022.12.01 |
|---|---|
| 리눅스_아파치 포트 변경 (0) | 2022.12.01 |
| 리눅스_쉘 스크립트_반복문(for 문) (0) | 2022.12.01 |
| 리눅스_프로젝트 관리 시스템(Redmine) 설치 (0) | 2022.11.30 |
| 리눅스_SSH 22포트로 LOGIN시 Access denied가 뜰 때 (0) | 2022.11.29 |


