출처: How To Install Tomcat 7 on CentOS/RHEL 7/6/5 - TecAdmin
How to Install Tomcat 7 on CentOS/RHEL 7/6/5
Apache Tomcat is a open source web server for Java application of Apache Foundation like Apache HTTP server. It used for deploying Java Servlet and JSP applications. To deploy an application in Tomcat we can simply create a war file and deploy them. For more details about you can visit apache official site http://tomcat.apache.org/.
This article will help you to install Tomcat 7 on CentOS/RHEL servers. We are using CentOS 7 and installing Apache tomcat 7. To read more about this release read Tomcat Release Notes.
Step 1 – Check Java VersionJAVA is the first requirement for Tomcat 7 installation. Make sure you have JAVA SE 7 or 8 version installed in your system. Currently, Java 9 does not support Tomcat. Use the following command to check if you have java installed already on your system.
java -version

java version "1.8.0_121"
Java(TM) SE Runtime Environment (build 1.8.0_121-b13)
Java HotSpot(TM) 64-Bit Server VM (build 25.121-b13, mixed mode)
If you do not have java installed, Use another article to install Java 8 in Red Hat based systems.
Download Apache Tomcat archive file from Apache tomcat official download page. You can use below wget command to download it.
cd /tmp
wget http://www-us.apache.org/dist/tomcat/tomcat-7/v7.0.99/bin/apache-tomcat-7.0.99.tar.gz
After competed download extract archive file in /tmp directory and move to the proper location as per your need. We are placing this under /usr/local directory.
tar xzf apache-tomcat-7.0.99.tar.gz
mv apache-tomcat-7.0.99 /usr/local/tomcat7
Tomcat is very easy to use, There is no need to compile its source. You simply extract the archive and start the tomcat server. Tomcat by default start on port 8080, Make sure no other services are running on the same port using ‘telnet localhost 8080’.
cd /usr/local/tomcat7
./bin/startup.sh
Sample Output
Using CATALINA_BASE:   /usr/local/tomcat7
Using CATALINA_HOME:   /usr/local/tomcat7
Using CATALINA_TMPDIR: /usr/local/tomcat7/temp
Using JRE_HOME:        /opt/jdk1.8.0_121
Using CLASSPATH:       /usr/local/tomcat7/bin/bootstrap.jar:/usr/local/tomcat7/bin/tomcat-juli.jar
Tomcat started.
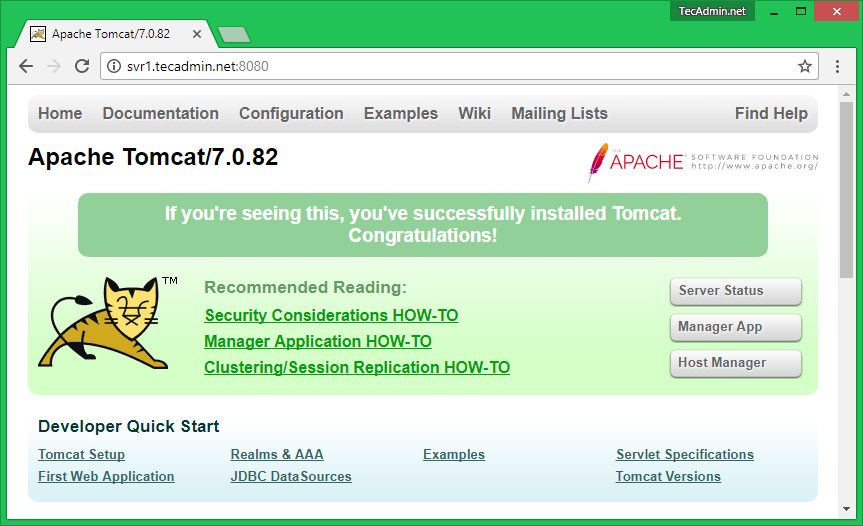
Tomcat server works on port 8080 default. To access Tomcat on the web browser by connecting your server on port 8080.
http://localhost:8080 
Finally we need to create user accounts to secure and access admin/manager pages. Edit conf/tomcat-users.xml file in your editor and paste inside <tomcat-users> </tomcat-users> tags.
<!-- user manager can access only manager section -->
<role rolename="manager-gui" />
<user username="manager" password="_SECRET_PASSWORD_" roles="manager-gui" />

<!-- user admin can access manager and admin section both -->
<role rolename="admin-gui" />
<user username="admin" password="_SECRET_PASSWORD_" roles="manager-gui,admin-gui" />
Step 6 – Stop Tomcat Server
Finally, if you feel that there is no need for Tomcat in your system, you can simply stop it using the below command from the tomcat home directory.
./bin/shutdown.sh
I hope above steps will help you to set up Tomcat 7 on your server. Read our next article to Install Tomcat 7 on Ubuntu. Tomcat 8 stable release is also available to download. Read our next article to Install Tomcat 8 in Linux
Thanks
'컴퓨터 활용(한글, 오피스 등) > 50_2.운영체제_리눅스' 카테고리의 다른 글
| Installation: Tomcat 8 on CentOS 7 or RHEL Red Hat Enterprise Linux 7 (1) | 2023.10.07 |
|---|---|
| 레드햇 엔터프라이즈 리눅스 버전 이해 (1) | 2023.10.07 |
| 서버 네트워크 보안장비 설정 (0) | 2023.10.01 |
| Ubuntu gdb 설치 (0) | 2023.09.28 |
| Ubuntu에서 한글 사용 (0) | 2023.09.05 |


